The Orders Queue settings section allows you to view and manage settings specific for the QwickServe Order Manager.
To view and manage QwickServe Order Manager settings:
- In the left menu of the administrative interface, tap the settings icon.
- Tap the Orders Queue tab.
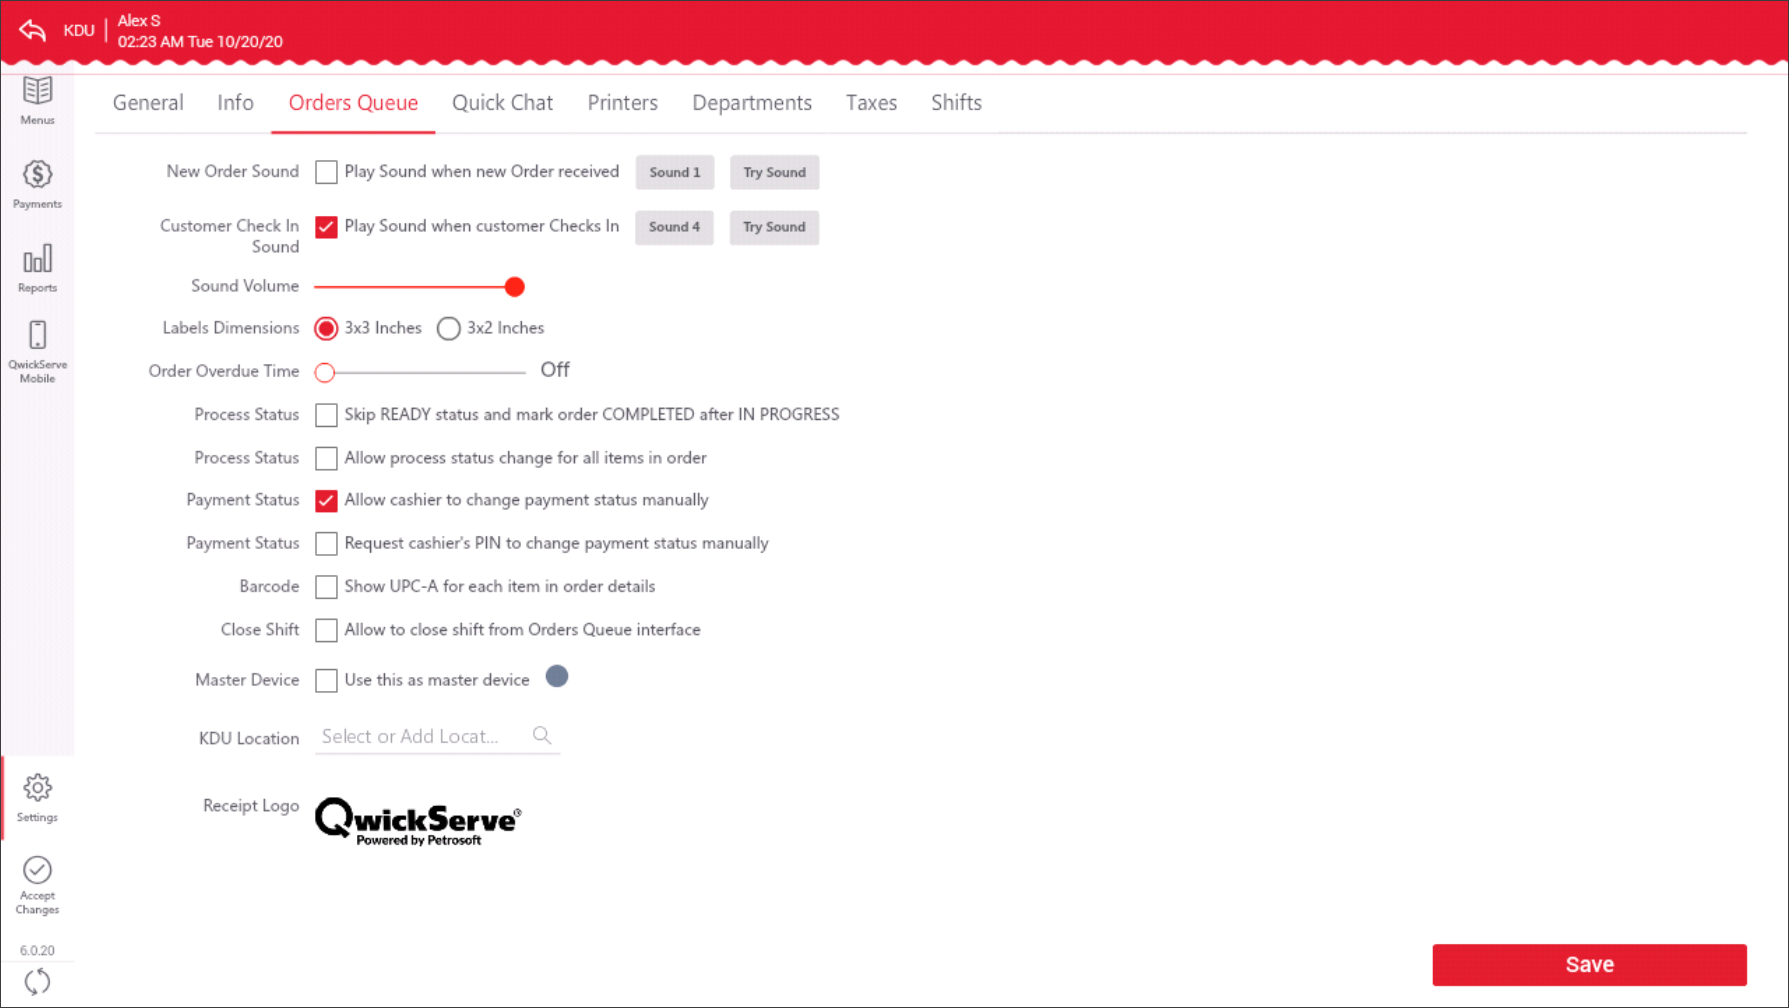
- View and adjust the following settings:
- New Order Sound: Select this check box to play the sound notification about a new order.
- Sound: Tap Sound and select the notification melody from the list.
- Try Sound: Tap it, to test the selected sound.
- Customer Check In Sound: Select this check box to play the sound notification once the customer taps Check In at QwickServe Mobile or QwickServe Ordering Terminal.
- Sound: Tap Sound and select the notification melody from the list.
- Try Sound: Tap it, to test the selected sound.
- Sound Volume: Swipe the controller to set the sound volume.
- Label Dimensions: Select the recipe label size:
- 3x3 Inches
- 3x2 Inches
- Order Overdue Time: Select the time after which an order is marked as a rush one.
- Process Status:
- Skip READY status and mark order COMPLETED after IN PROGRESS: Select this option, if you want to turn on the Ready status for the orders at the kitchen.
- Allow process status change for all items in order: By default, a cook changes the status for each item in the order separately. For busy kitchens when itemized status updates are not required, you can enable this option. In this case, the cook will be able to change the status for all items in the order at once using the corresponding batch action buttons in the orders queue interface.
- Payment Status:
- Allow cashier to change payment status manually: Select this option, to allow cashiers or cookers to change the payment status manually from the QwickServe devices. For example, when the order is paid at the cash register, not online.
- Request cashier's PIN to change payment status manually: Select this option, to ask the cashier to enter PIN each time the payment status is changed manually.
- Barcode: Select this option, to display UPC-A code for each item in the order details.
- Close Shift: Select the Allow to close shift from Orders Queue interface option, to allow cashiers to close shifts directly from the QwickServe device.
- Master Device: This option can be used for additional stability if the QwickServe Order Manager operates in the offline mode. In this case, one QwickServe Order Manager can be configured to act as the Master Device responsible for orders synchronization. All QwickServe Ordering Terminal will be able to address this Master Device for order number generation.
It is recommended that you enable this option if you have an unstable Internet connection. It is strictly not recommended to have more than one Master Device per location.
To configure Master Device settings:
- At the QwickServe Order Manager that you want to use as the Master Device, select the Master Device check box.
- On the App tab at QwickServe Ordering Terminal that will be working with this QwickServe Order Manager, set the Order Number Generation Mode option to Master Device. For more details, see QwickServe Application Settings.
- KDU Locations: Select one or several locations (created and assigned to items on the back-office side) that will send orders to QwickServe Order Manager.
- Receipt Logo: Add the image to be displayed in the customer receipts, if needed.
For more information about all order statuses, see Order Statuses.
If the Master Device is configured but QwickServe Ordering Terminal are still set to synchronize order numbers in the Cloud mode, the order number generation mode will be automatically switched to Master Device when the devices are offline. To avoid a single point of failure, when the Master Device goes down, QwickServe Ordering Terminal will attempt to switch back to the Cloud mode.
- After you configure QwickServe Order Manager settings, at the bottom left corner, tap Save.