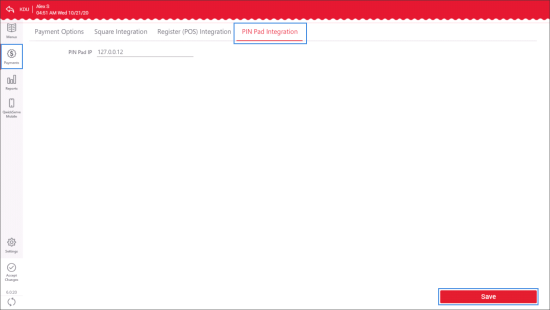
In case the PIN Pad is connected, enter its IP address in the PIN Pad Integration tab.
To enter the PIN Pad IP address:
- In the left menu of the administrator's interface, tap Payments.
- Tap PIN Pad Integration.
- In the PIN Pad IP field, enter the PIN Pad IP address.
- At the bottom right of the tab, tap Save.

To identify the IP address of the PIN Pad, turn on the PIN Pad, connect it to the Ethernet switch, and then do the following:
- Press the FUNC button, to enter the password.
- Enter the password and then press the Enter button.
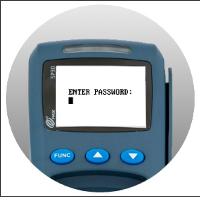
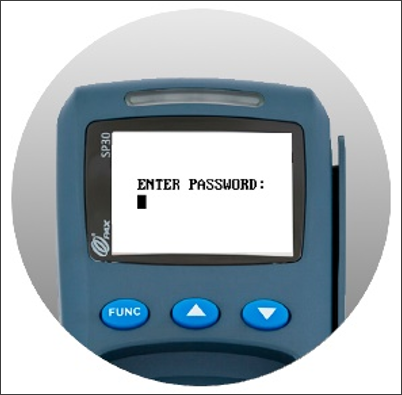
The password equals to the current date. The password format is MMDDYYYY. For example, 05292019.
Result: The MAIN MENU opens.
- In the MAIN MENU, select the 6. Communication menu option and then press Enter.
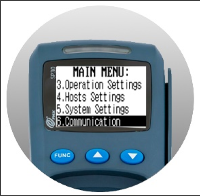
- Enter the password from the step 2 once again and then press the Enter button.
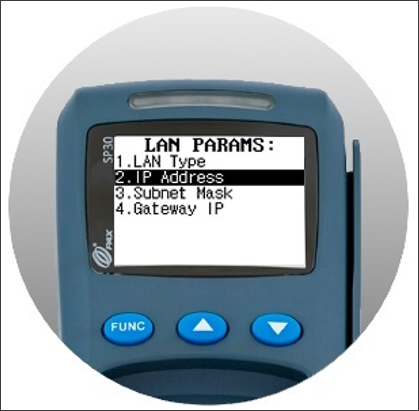
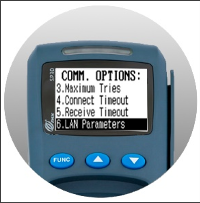
Result: The COMM. OPTIONS menu opens. - In the COMM. OPTIONS menu, select the 6. LAN Parameters menu option and then press Enter.
Result: The LAN PARAMS menu opens. - In the LAN PARAMS menu, select the 2. IP Address option and then press Enter.
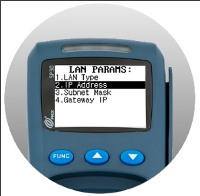
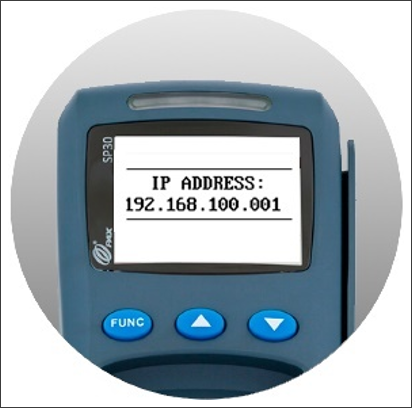
Result: The IP Address of the PIN Pad is displayed on the device's screen.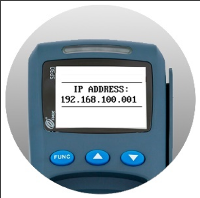
- Save the IP address of the PIN Pad to use it further in the process of configuring the payment settings on the QwickServe devices.
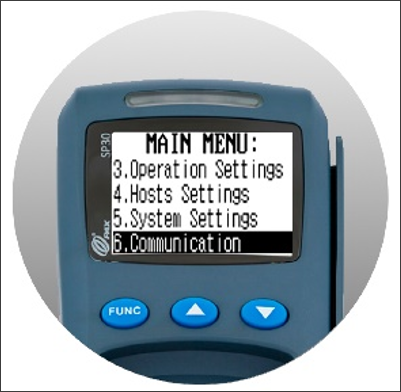
To search for the menu option you need, use the up and down buttons on the device.