


Opening the Report
To open the QwickServe Order History report:
- Log into CStoreOffice®.
- At the top left of the main page, in the product switcher, select QwickServe.
Result: QwickServe product main page opens. - At the top right of the main page, select the location.
- In the left menu, go to Related Reports > QwickServe Order History.
Result: The report opens for the selected location.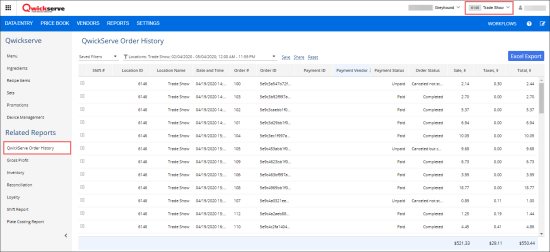

Working with the Report
The QwickServe Order History report provides you the detailed information about the orders processed at QwickServe devices such as QwickServe Order Manager, QwickServe Ordering Terminal.
You may use this report during reconciliation to find out the reasons of data mismatch, if any.
While performing reconciliation, you may analyze the following data in the report:
- Shift #: The number of the shift closed by a cashier at the QwickServe device.
- User Name: The name of the user who made an order.
- Phone: The mobile phone number of the user who made an order.
- Location ID: The identifier of the location in CStoreOffice®.
- Location Name: The name of the location.
- Date and Time: The date and time when the shift was closed by a cashier at the QwickServe device.
- Order #: The number of the QwickServe order. This number is assigned automatically at the QwickServe device once the order is created.
- Order ID: The order identifier.
- Payment ID: The payment identifier.
- Payment Vendor: In case the order is paid online via customer card, the payment vendor will display Braintree as currently QwickServe supports for online payments with Braintree.
- Payment Status: The order payment status which may indicate three possible values:
- Paid
- Unpaid
- Refunded
- Order Status: The order processing status at the QwickServe device which may indicate the following values:
- Completed
- Canceled
- Canceled not started
- Canceled but completed
- Sale, $: The amount of sales within the order.
- Taxes, $: The amount of taxes within the order.
- Total, $: Total amount of the order.
The User Name and Phone columns are hidden by default. To display them in the report, hover over any column's name, click the right arrow, click Columns, and then select User Name and Phone.

The order and payment identifiers are used to find and analyze the payment transaction in your profile of the payment vendor, such as Braintree.
At the bottom right of the report table, the following totals are displayed for all orders in the report: Sale, $, Taxes, $, and Total, $ columns.
To get the information about the order items, to the left of the order, click the plus icon.

You can also generate the report for all locations on your account, to get the general statistic data. For details, see Filtering the Report Data.
Filtering the Report Data
By default the report is generated for the current day and for the location selected at the top right of the screen.
You can change the default report settings and generate it to match the criteria you need.
To generate the report with applied filters:
- Below the report name, click the filter icon.
Result: The Applied filters window opens. - In the Applied filters window:
- Select the filters you need. To the right of the selected filter, click Done. You can select any of the following filters:
- Shift #
- User Name
- Phone
- Locations
- Period
- Time
- Order #
- Order ID
- Payment ID
- Payment Vendor
- Payment Status
- Order Status
- GTIN
- PLU
- At the top right of the window, click Apply.
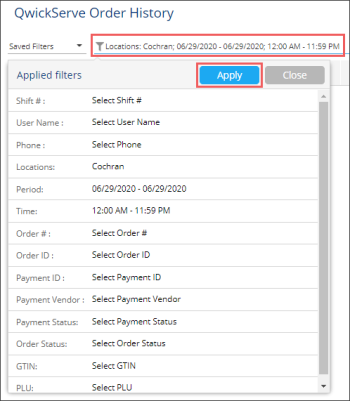
Result: The report is refreshed to display the filtered data.

Exporting Report Data
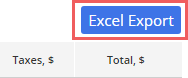
You can export the QwickServe Order History report data to Microsoft Excel format (2007 and later versions). It allows you to share the data with colleagues and contractors, prepare reports for management and uncover deeper insights from your order data.
Click the Excel Export button located above the report to export the report data matching the selected filters.
The exported workbook consists of two spreadsheets:
- Order History: key (top-level summary) details from your QwickServe Order History report.
- Order UPC List: in-depth details on items included in orders.
The data in both spreadsheets can be linked together using the Order ID field.


