


This section provides only basic settings and steps required for QwickServe infrastructure configuration. For detailed information about the site configuration, refer to Sunoco Best Practices for VeriFone System Installations: Commander and Ruby CI Site Controllers that can be obtained from Sunoco technicians.
In all configurations, QwickServe and DC-401 devices must be connected to the back-office VLAN of the firewall device. In this case, it is LAN 3 port of the firewall device.
In Sunoco-branded sites, this firewall device is Prysm PRO.
It is important to note that Sunoco-branded sites have never utilized Cybera Enhanced Zone Router. Instead, Cisco ASA 5505 is used as the Verifone firewall. While a specific Petrosoft configuration to use at sites seems to be NO EZR, Sunoco-branded sites are unique and do not follow the NO EZR method.
Always use the following preferences and be sure to connect the back-office equipment to LAN 3 port of Prysm PRO.
Common Network Settings
- Back Office Zone: LAN3
- LAN IP Range: 192.168.87.0
- Gateway: 192.168.87.1
- Netmask: 255.255.255.0
- DNS1: 148.74.252.7
- DNS2: 148.74.252.8
- Commander IP: 192.168.87.15
Connection Details
Firewall Device (Prysm PRO)
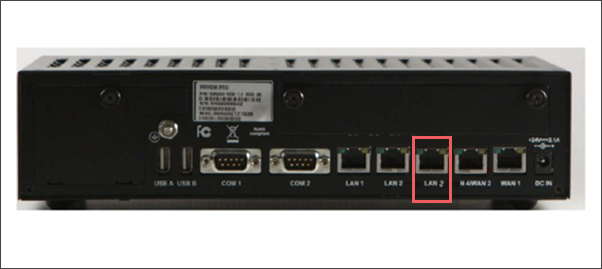
- Port: LAN 3
- Static IP: 192.168.87.1
- Cable: Ethernet
Edge (DC-401)
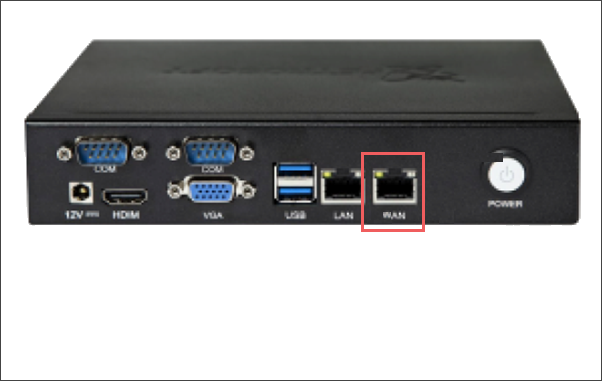
- Port: WAN
- Static IP: 192.168.87.2
- Cable: Ethernet
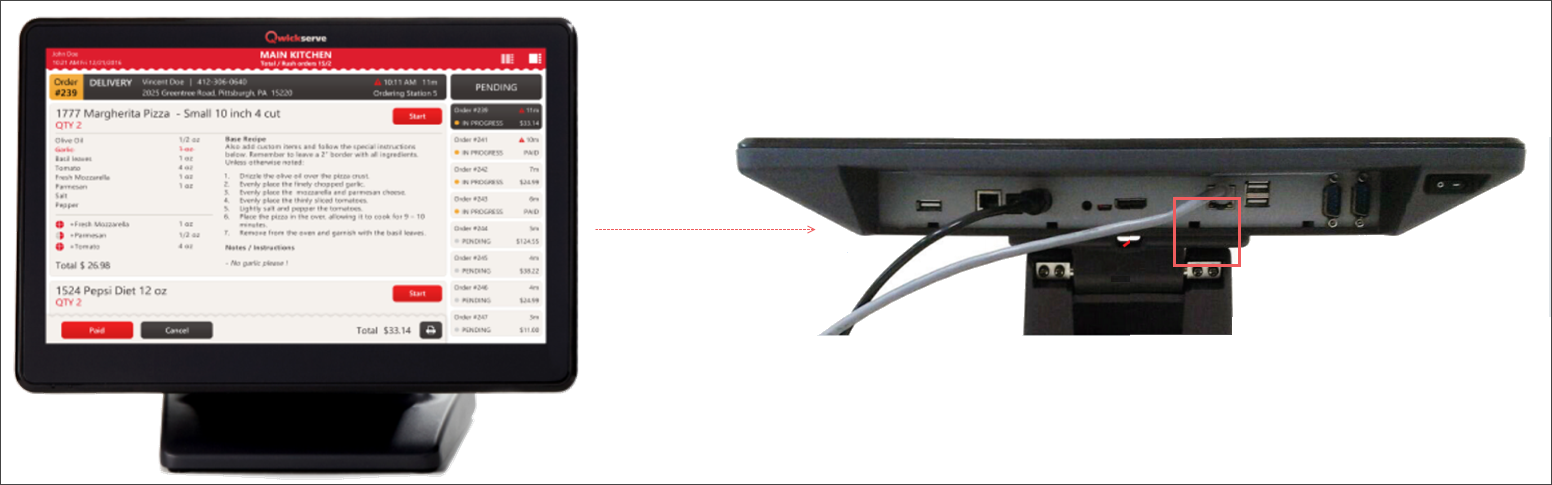
QwickServe Ordering Terminal

- Port: LAN
- Static IP: 192.168.87.3
- Cable: Ethernet
Additional units must have static IP addresses starting from 192.168.87.9+.
QwickServe Order Manager
- Port: LAN
- Static IP: 192.168.87.4
- Cable: Ethernet
Additional units must have static IP addresses starting from 192.168.87.9+.
QwickServe Payment Terminal
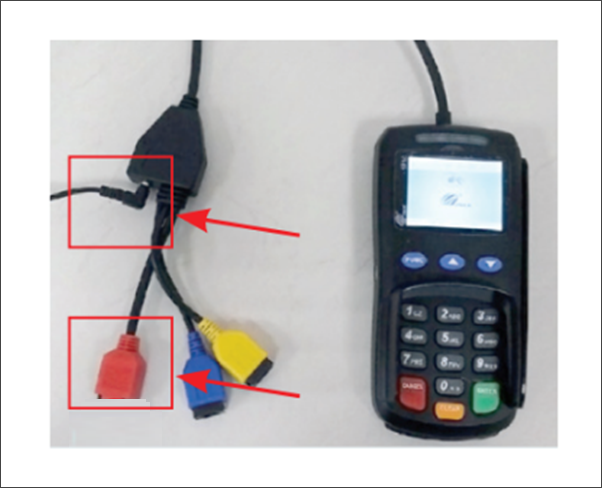
- Port: RED static
- IP: 192.168.87.6
- Cable: Ethernet
Kitchen and Customer Receipt Printer
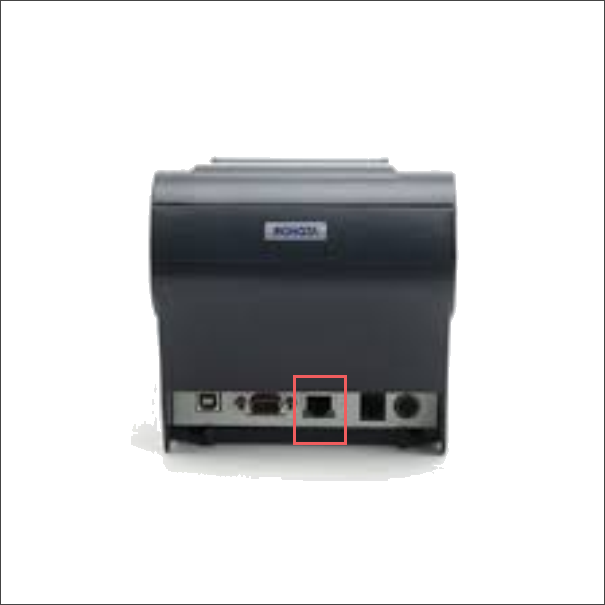
- Port: LAN
- Static IP: 192.168.87.9
- Cable: Ethernet
Additional units must have static IP addresses starting from 192.168.87.9+.
Label Printer
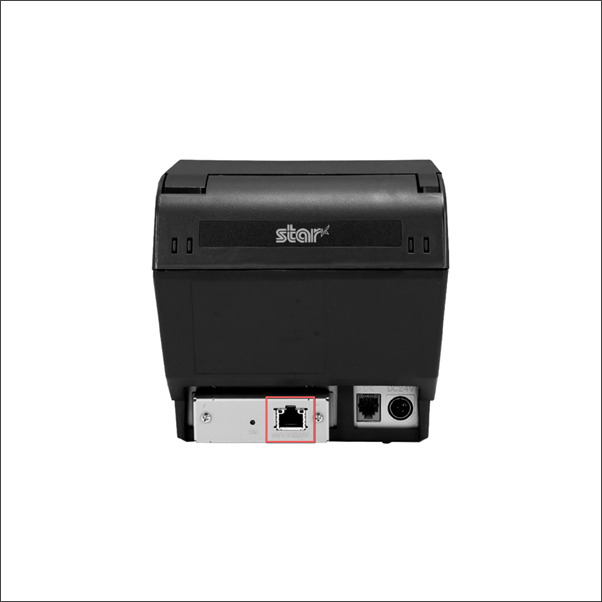
- Port: LAN
- Static IP: 192.168.87.10
- Cable : Ethernet
Additional units must have static IP addresses starting from 192.168.87.9+.
Setting up the QwickServe Infrastructure
To set up the QwickServe infrastructure:
- Connect the network switch to Prysm PRO, port LAN 3 (if it is not already connected).
- Connect DC-401 to the network switch using the WAN port on DC-401.
- Follow the DC-401 Activation Guide to connect DC-401 to Petrosoft Cloud. For details, see
- Connect the QwickServe Ordering Terminal to the network switch.
- Configure static IP addressing at the QwickServe Ordering Terminal. For details, see
- Connect the QwickServe Order Manager to the network switch.
- Configure static IP addressing at the QwickServe Order Manager. For details, see Connecting QwickServe Order Manager to the LAN.
- Connect the kitchen and customer receipt printer to the network switch.
- Configure static IP addressing at the kitchen and customer receipt printer. For details, see Thermal Printer for Receipts, Kitchen Tickets and Reports.
- Connect the label printer to the network switch.
- Configure static IP addressing at the label printer. For details, see


