


Combo Header
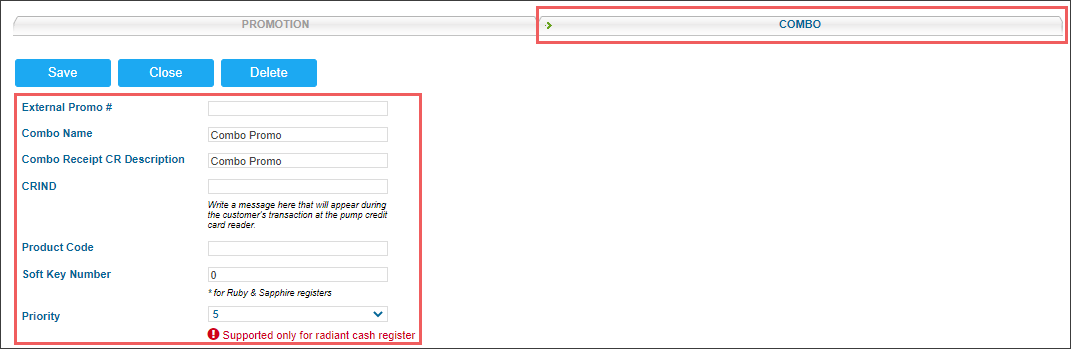
The information at the top of the page identifies the combo promotion in CStoreOffice® and in the cash registers.
| Field | Description |
| External Promo # | External combo identifier. This field is available under the following conditions: - only for Radiant cash registers - if the Send External Promo # to CR option is selected at the Cash Register form at Data Entry > Dashboard > Station Options > Cash Register > Advanced > Advanced - if the Allow user to edit Permission for External promo ID permission is activated for the current user In case one combo is created for several locations, it will be saved with the same External Promo # value for each location. |
| Combo Name | This is the name of the combo in CStoreOffice®. |
| Combo Receipt CR Description | This is the name of the combo in the cash register. It cannot exceed ten characters including spaces. |
| CRIND |
This stands for Card Readers in Dispenser (initially a Gilbarco term, now used generically). A message that will appear during the customer's transaction at the pump credit card reader can be entered. This parameter is currently not supported by the cash registers. |
| Product Code | This is the code assigned to a combo for identifying it as an item at the cash register. |
| Soft Key Number | This is the number of the soft key assigned to this combo on the cash register. Supported only by Ruby and Sapphire registers. |
| Priority |
In case you have several promotions for same group of items, specify the priority in which the promotion will be applied on the cash register in order to be in compliance with the vendor policy. Possible values: - Empty: Leave the Priority field blank, if you have only one promotion for one certain group of items. - From 0 to 10: Define the promotion's priority by setting up the lowest value to the highest priority level. The Priority field is supported only by the Radiant cash registers. For more information on cash register limitations, see Compatible Cash RegistersCompatible Cash Registers. |
Above these fields, there are also buttons for saving the changes made to the combo and closing the form without saving the changes.
What is Included?
In this section, the following needs to be defined:
- The items to be included in the combo. For details, see Including Items in Combo.
- The settings these items will have. For details, see Configuring Items Settings for Combo.
Including Items in Combo
The following types of items may be included in the combo:
- Items: Including common items to your combo.
- Fuel :Including any type of fuel on the station to your combo
- Car Wash :Including to your combo the items from the following types of departments:
- 'Car Wash' departments
- 'Other Income' departments where the Income Type value equals 'Car Wash' or 'CarWash'.
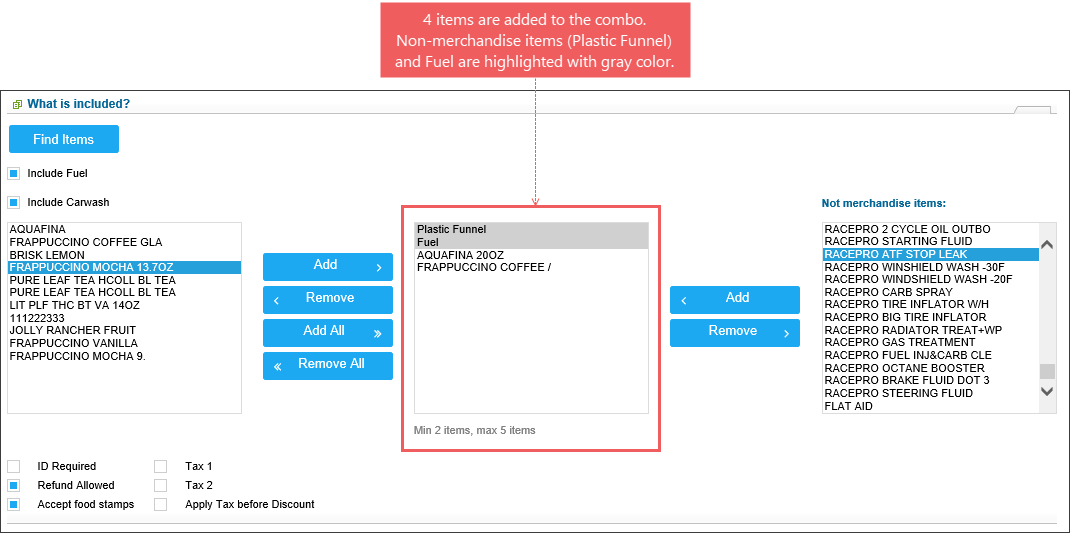
The combo may contain a minimum of two and a maximum of five items.
All types of items included in the combo are displayed in the second column in the What is Included? section.
Adding Items to Combo
To select the items for the combo, follow these steps:
- Click Find Items to add the desired items to the left column.
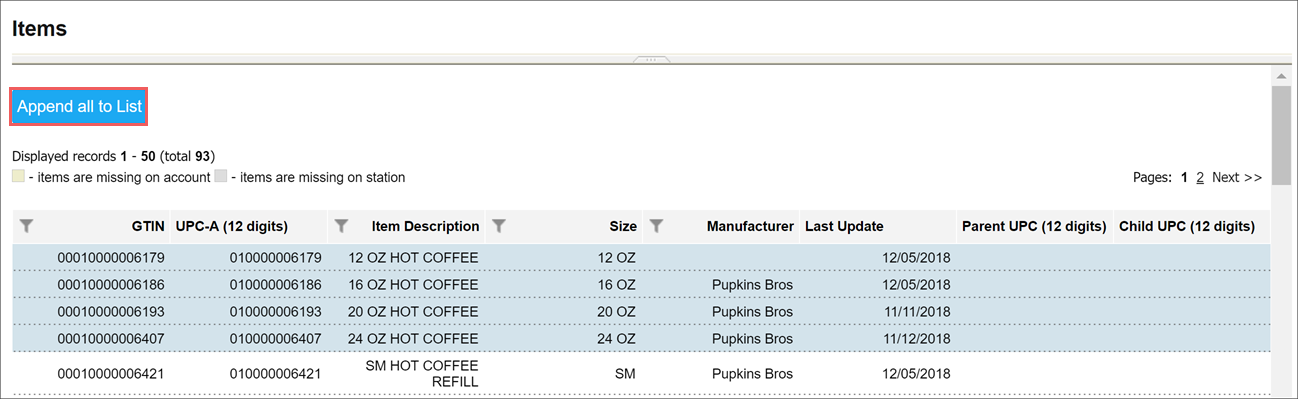
Result: The Items list opens in a new window. - Use the Find and Replace tool to find the necessary items.
- Select the items to be included in the combo.
- Click the Append all to List button above the items list.

Result: The selected items appears in the What is included section in the left column. - In the What is included? section > left column, select the desired items to add to the combo.
- On the right of the left column, click Add.

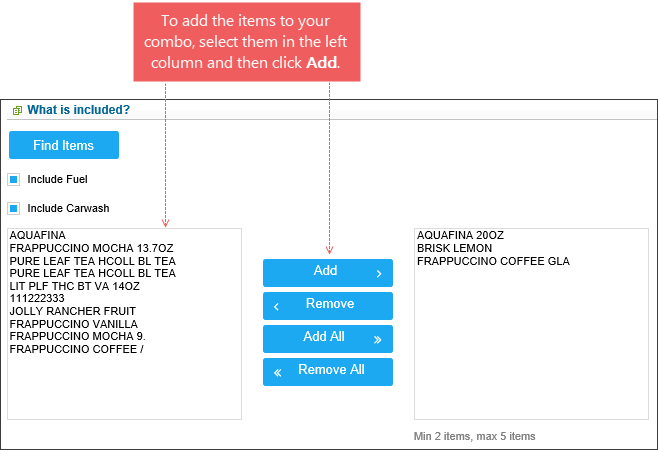
To remove the items from the combo column, select them and click Remove.
To add all items from the left column to the combo column, click Add All.
To remove all items from the combo column to the left column, click Remove All.
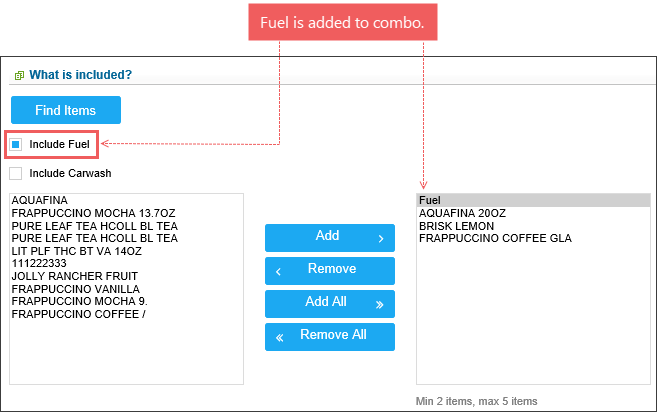
Adding Fuel to Combo
To add the fuel to the combo, select the Include Fuel option.
To remove the fuel from the combo, clear the Include Fuel option.
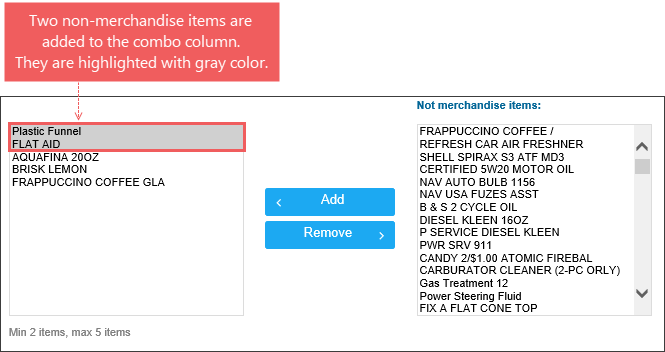
Adding Car Wash Items to Combo
To add the car wash items to the combo, follow these steps:
- Select the Include Carwash option.
Result: All available non-merchandise items appear in the Not merchandise items column. - In the Not merchandise items column, select the desired items to be added to the combo.
- On the left of the Not merchandise items column, click Add.
Result: The items are added to the combo column.
To remove the non-merchandise items from your combo, on the left of the Not merchandise items column, click Remove.
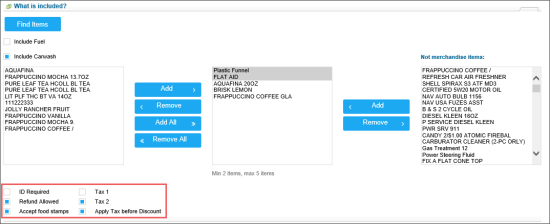
Configuring Items Settings for Combo
In the What is included section, the following items settings can be configured for the combo:
- ID Required: Select this check box to enable the requesting support documents option for this combo.
- Refund Allowed: Select this check box to enable the transactions refund for this combo.
- Accept food stamps: select this check box to allow using food stamps to pay for this combo.
- Tax 1 and Tax 2: Select the taxes to be applied to the combo.
- Apply Tax before Discount: Select this option to calculate the tax amount before applying the combo price and send this tax amount to a cash register (only for Ruby Sapphire cash registers). Make sure the 'Allow Tax before Mix and Match Discount' option is selected at Data Entry > Dashboard > Cash Register > Advanced.
For more information about items taxes, see Setting Up Item Taxes.

How Much?
In the How Much section, for each item included in the combo, specify the following parameters:
- Quantity: The number of items to be sold together within this combo.
- Discount: The value of discount selected in the Discount type column and applied to this item. This field is mandatory for the Combo promotion.
- Discount type: One of the following discount types:
- New price: Replaces the current item price by the predefined price value.
- Amount: Reduces the item price by the predefined amount.
- Percent: Reduces the item price by the predefined percent.

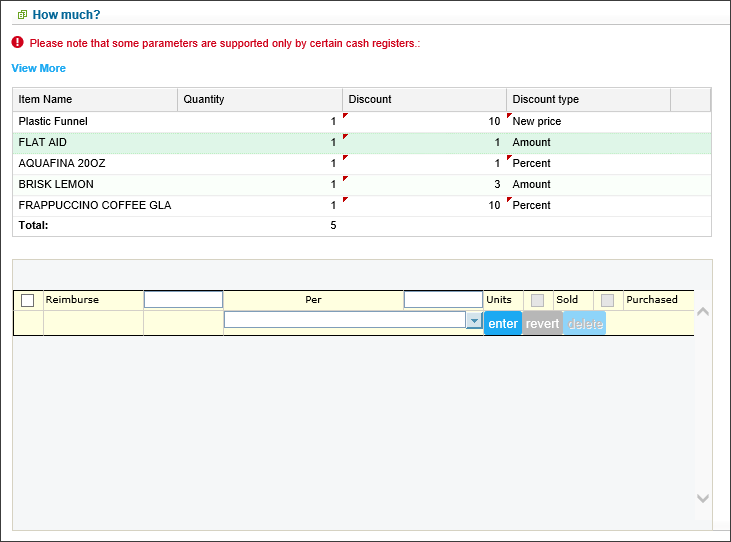
Buydown
This section does not have a heading and is just below the How Much? section. If the combo implies a buydown from the vendor, enter the buydown information here. Leave the section blank if the combo is not eligible for a buydown.
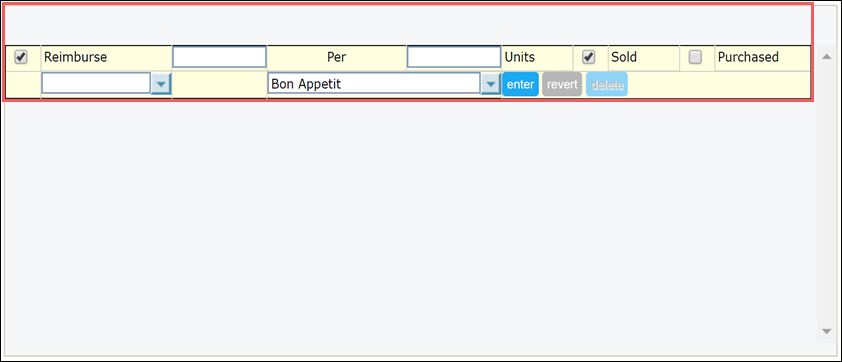
- Reimburse: Select this check box if the combo provides the Buydown. Enter the Buydown amount in the field to the right.
- Per….Units: This is the number of items units, which are bought or sold in order to receive the Buydown.
- Sold or Purchased: Mark whether the Buydown is applied at the time items are purchased or sold. This option affects accounting.
- Vendor: In the line below, select a vendor who will be returning the Buydown. Upon setting all necessary parameters, click enter.
Sometimes the Buydown is paid not by one but by several vendors, in such case it is necessary to enter each vendor’s conditions into the combo settings.
The difference between the price reduction and the total reimbursement will automatically be calculated by the system.
Inclusion in a combo does not reduce the current retail for the item. Combo items continue to be taken to inventory at their full price.
- If the cash register is connected to the server, the quantity of the items sold by each combo and the total Price Change and Buydown included in the shift reports will be seen.
- If the cash register is not connected to the server, look in the forms Data Entry/Store/Price Change and Data Entry/Store/Buydown for daily lists of active combos. The quantity of the items sold by each combo will have to be entered manually.
Example of a buydown calculation
A Marlboro 65 cents off promotion is set up in the following manner:
Price Reduction = $0.65
Reimburse = $0.15 from Phillip Morris
In other words, the items with this combo will be sold at 65 cents off, and when an item is sold, 15 cents will be returned by Phillip Morris. The 15 cents is considered a Buydown, and a price change will be calculated for the rest 50 cents (65 - 15 = 50).
When taking 130 packs of Marlboro cigarettes into consideration, the total price change will be $65, not $84.5. However, the items should go to inventory at full price, as both the price change and buydown will be taken off (Price Change $65 + Buydown $19.50 = $84.50).
When?
In this section, define the time frame of the combo:
- Use the calendar icon to set the start date.
- Use the calendar icon to set the end date or select the Indefinitely check box if your combo does not have an end date.


Where are?
In this section, select the locations on which your combo will be active.
To select one or several locations for the combo, follow these steps:
- In the Participation list, select the type of the combo's location.
Result: The list of locations for the selected type is displayed in the left column. - In the left column, select the locations for which the combo is being created.
- Click Add.
Result: The locations are added to the right column. The combo will be active for these locations.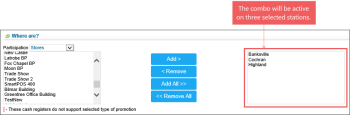
To remove the locations from the right column, select them and click Remove.
To add all locations from the left column to the right column, click Add All.
To remove all locations from the right column to the left column, click Remove All.

Promo Errors
This section displays system error messages, in case the items included in the combo don't match one or several of the following criteria:
- Items don't exist on the selected station.
- Current Retail Price, Department, or Category are not specified for the items.


