


To be able to get video in LPA module, make sure that all 4 cameras are configured properly. Use the following troubleshooting steps, to check if all your cameras are configured properly and work.
After the completion of each step, check if it is successful and you can complete troubleshooting. For details, see Checking Troubleshooting Results.
- Step 1: Make sure the cameras are up and running.
- Step 2: Make sure the IP addresses for cameras are set up correctly.
- Step 3: Check the camera credentials.
- Step 4: Check the camera codecs.
- Step 5: Check the camera config.
- Step 6: Check time settings on the cameras.
- Additional Steps
Step 1: Checking if the Cameras are Up and Running
To check if the cameras are up and running:
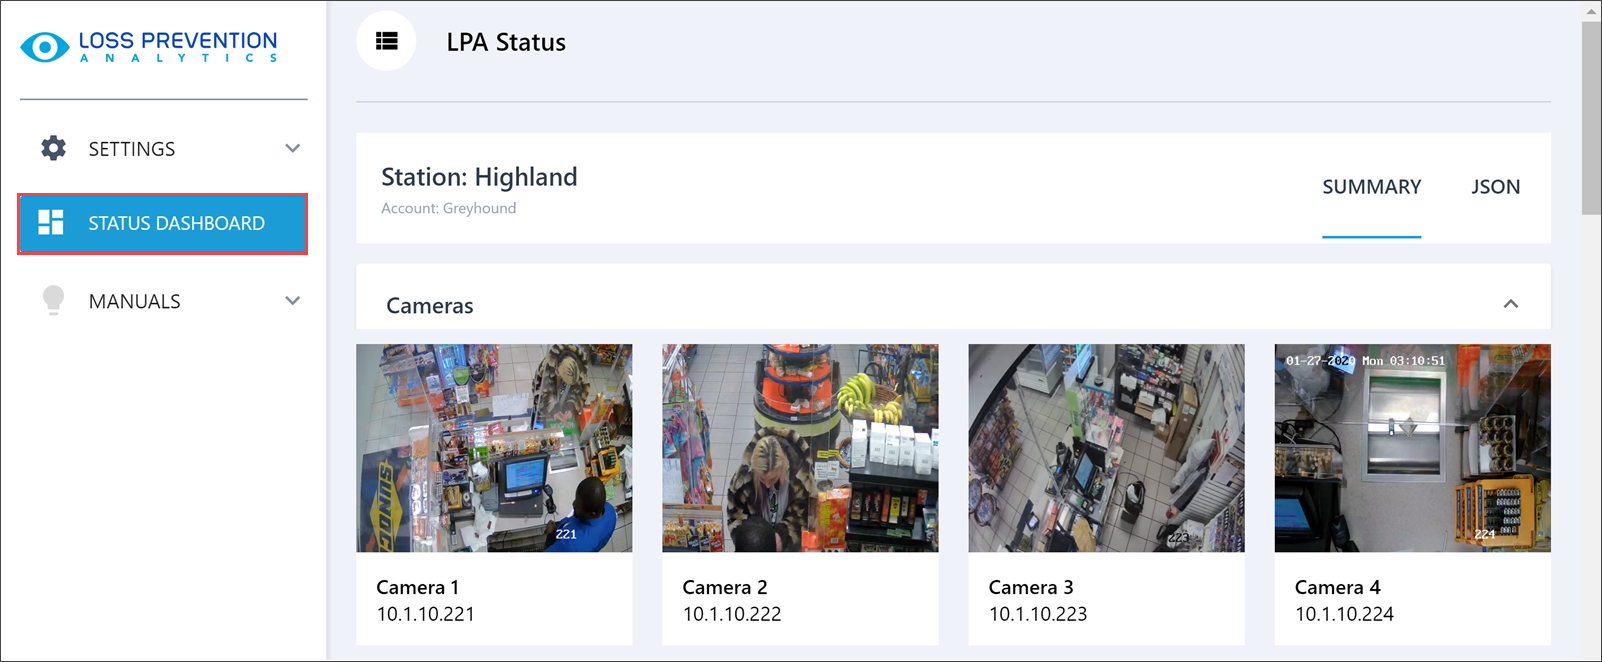
- In the top menu of the Loss Prevention Analytics module, select Dashboard.
- In the left pane of the LPA dashboard, select Status Dashboard.
- For each connected camera, make sure the video is playing.
Step 2: Checking the Camera IP Addresses
To check the camera's IP address:
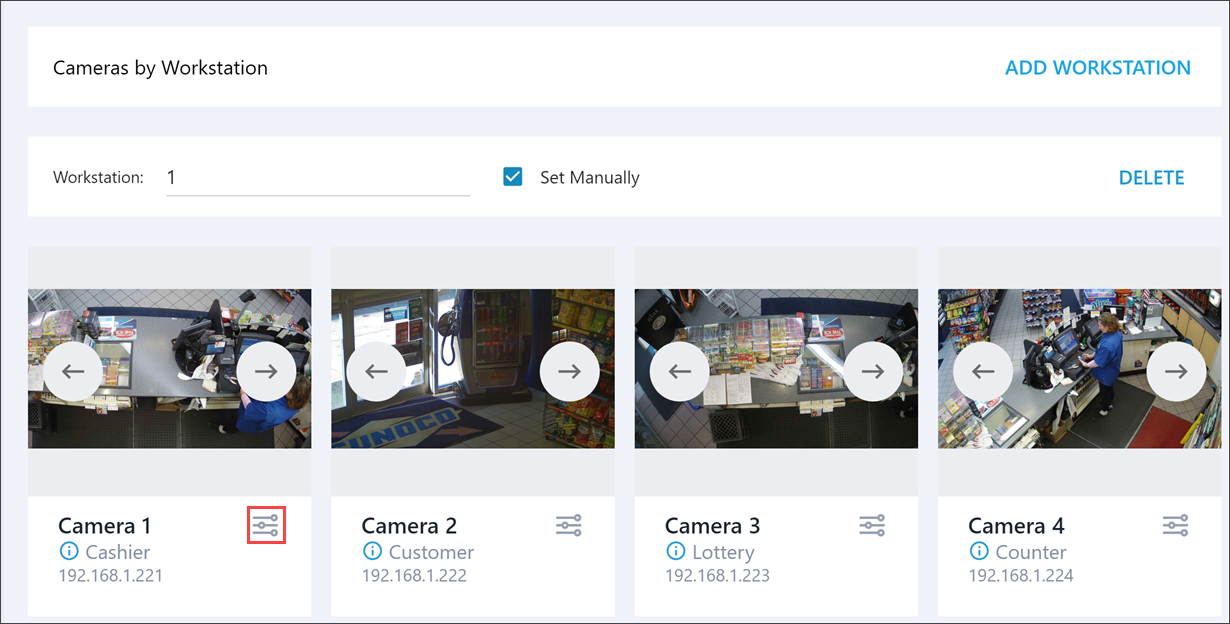
- In the left pane of the LPA dashboard, go to Settings > Cameras.
- In the Camera Settings section, at the bottom right of the necessary camera slot, click the settings icon.
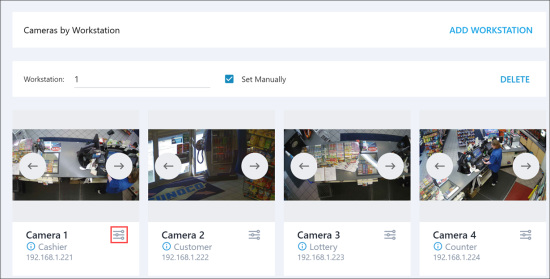
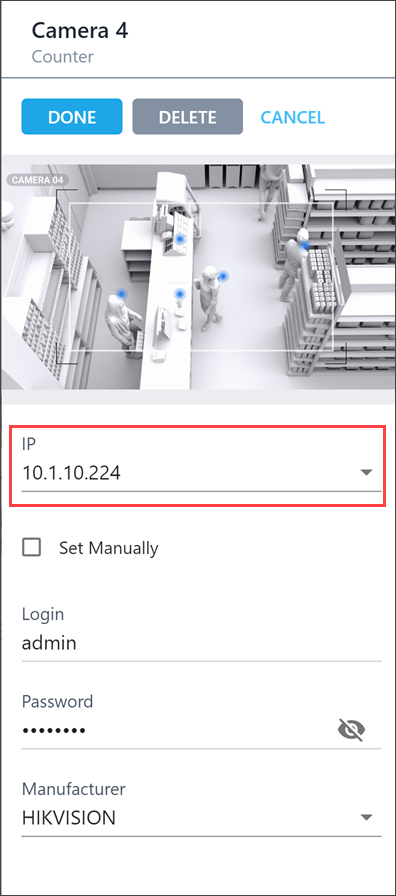
- In the IP field, check the camera IP address. If you enter the IP address manually, make sure it does not contain extra spaces or other extra characters.

Step 3: Checking the Camera Credentials
Check the camera's credentials and the credentials set for the camera in LPA. They should match each other:
- Login: Make sure the login's value equals to admin for the camera and camera's settings in LPA.
- Password: Make sure the password set during the camera's activation equals to the password set in Loss Prevention Analytics.
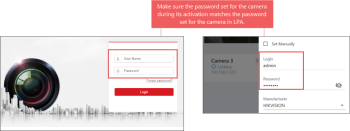
If credentials don't match, do either of the following:
- Reset camera's credentials in LPA. For details, see Updating Camera's Settings.
- Reset the camera's credentials. If you use HIKVISION cameras, refer to the manufacturer's documentation: Password Reset with the SADP Tool.
Step 4: Checking the Camera Codec
In the camera web interface, check what codec the camera uses to capture video.
Loss Prevention Analytics supports video records captured only with the H.264 codec. If your camera uses other codec, you can do either of the following:
- Change the camera's codec to H.264, if possible.
- Use the Microsoft Edge browser to view video in Loss Prevention Analytics.
Step 5: Checking the Camera Config
For each video stream, check if the camera config is set up properly.
If you use HIKVISION cameras, follow the steps described below. If you use other cameras, refer to the manufacturer's documentation.
- Connect to the camera. Open a web browser, in the address bar, enter the camera's IP address and then press Enter on the keyboard.
- Log into camera interface.
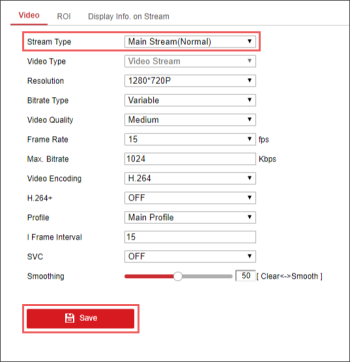
- In the main menu, go to Configuration > Video/Audio.
-
Go to the Video tab.
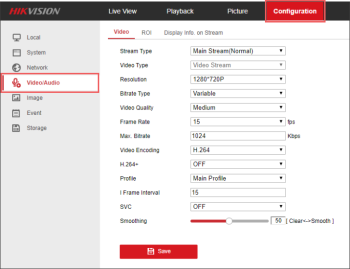
- In the Stream Type list, select a stream and make sure its settings are configured properly:
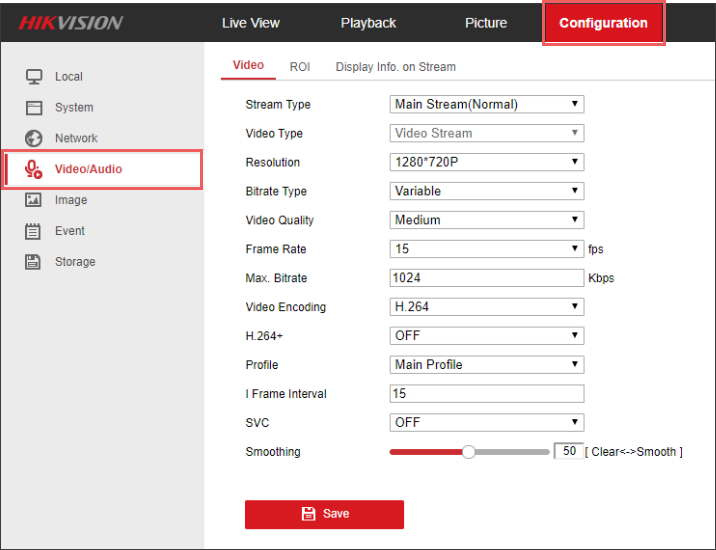
- Main Stream (Normal): This stream is used to display the video journal. Make sure its settings are configured as it is shown in the image below:
- Sub-stream: This stream is used to broadcast a live stream. Make sure its settings are configured as it is shown in the image below:

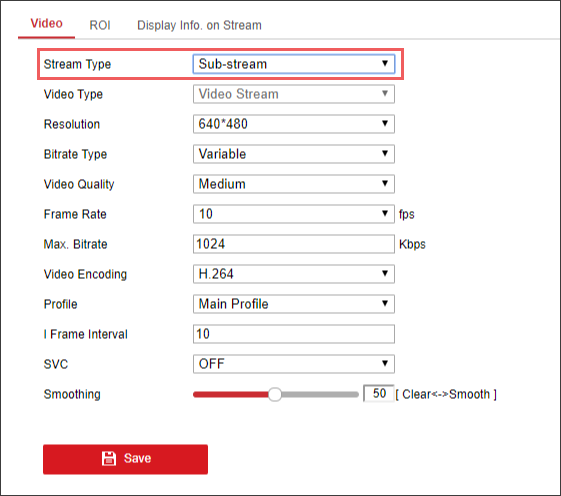
- At the top of the Video tab, click the Save button.
Step 6: Check time settings on the cameras
For each camera, the camera's time should be synchronized with the computer time.
If you use HIKVISION cameras, follow the steps described below. If you use other cameras, refer to the manufacturer's documentation.
- Connect to the camera. Open a web browser, in the address bar, enter the camera's IP address and then press Enter on the keyboard.
- Log into camera interface.
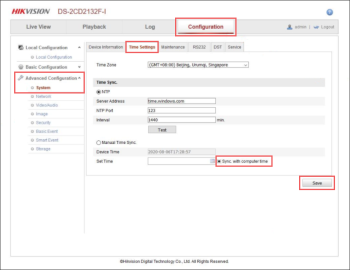
- From the main camera's menu, click Configuration.
- In the left menu, click Advanced Configuration > System.
- Go to the Time Settings tab.
- Select the Sync. with computer time option.
- Click Save.

Additional Steps
How to Reboot the Camera
- Trace the cabling from the camera to the PoE switch.
- Disconnect this cable from the camera.
- Wait for a while.
- Connect the cable back to the camera.
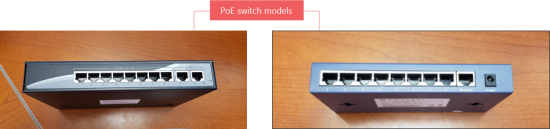
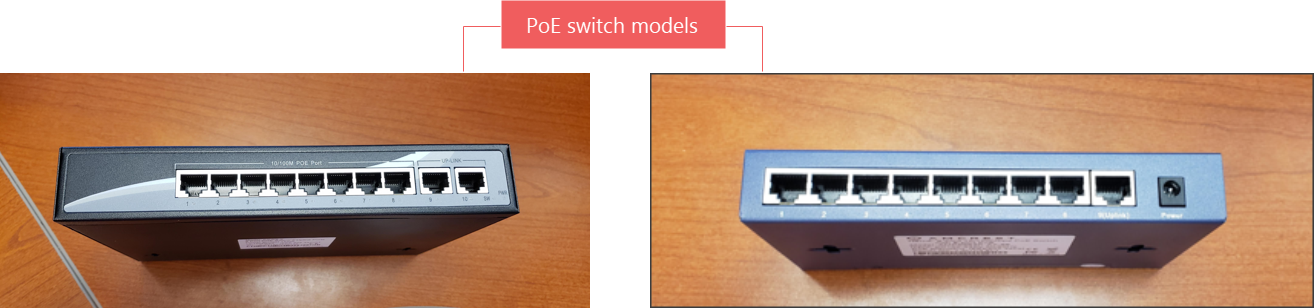
How to Reboot the PoE Switch
In some cases, you may need to restart the IP camera PoE switch. Do the following:
- Locate your PoE switch. Depending on the model it may look as it is shown in the images below.
-
Trace the power cabling from the PoE switch to the wall outlet.
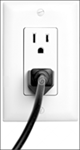
- Disconnect the power cable from the wall outlet.
- Wait approximately 5-10 seconds.
- Reconnect the power cable into the wall outlet.
- Go to the LPA dashboard > Status Dashboard > Summary and make sure video streams from the cameras are available in the Cameras section.

During this time the PoE and cameras are fully powered off.


