You can customize the dashboard so that it displays only required data in the way you need. CStoreOffice® allows you to perform the following operations to customize the dashboard itself and the widgets:
- Remove and add widgets
- Change the widget position in the dashboard
- Reset the dashboard
- Change the reporting period
- Select what data to display in the widgets
- Refresh data in widgets
Removing and Adding Widgets
You can remove some widgets from the dashboard, for example, if you do not need the information that these widgets present at hand.
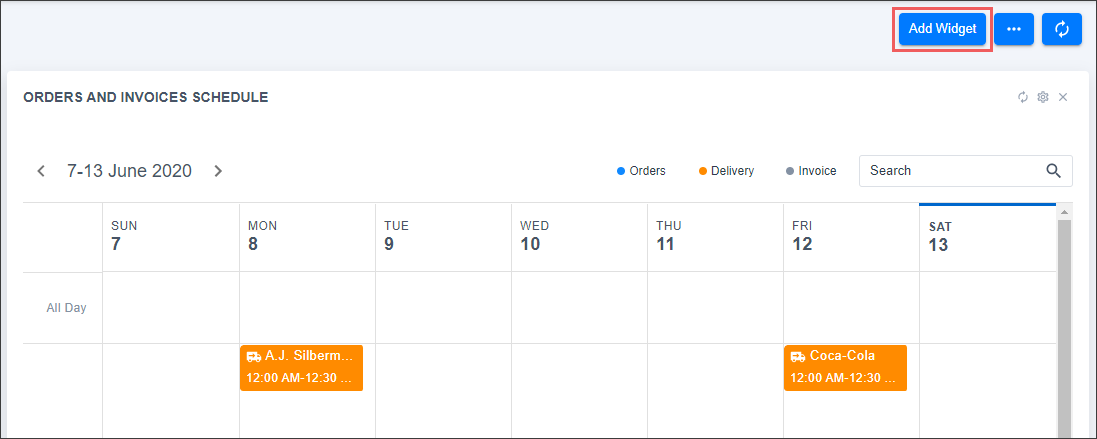
To remove a widget, at the top right of the widget, click the delete icon.
Widgets are not removed permanently from the dashboard. You can bring them back at any time. To do this, at the top right of the dashboard, click Add Widget and select the widget to add from the list.
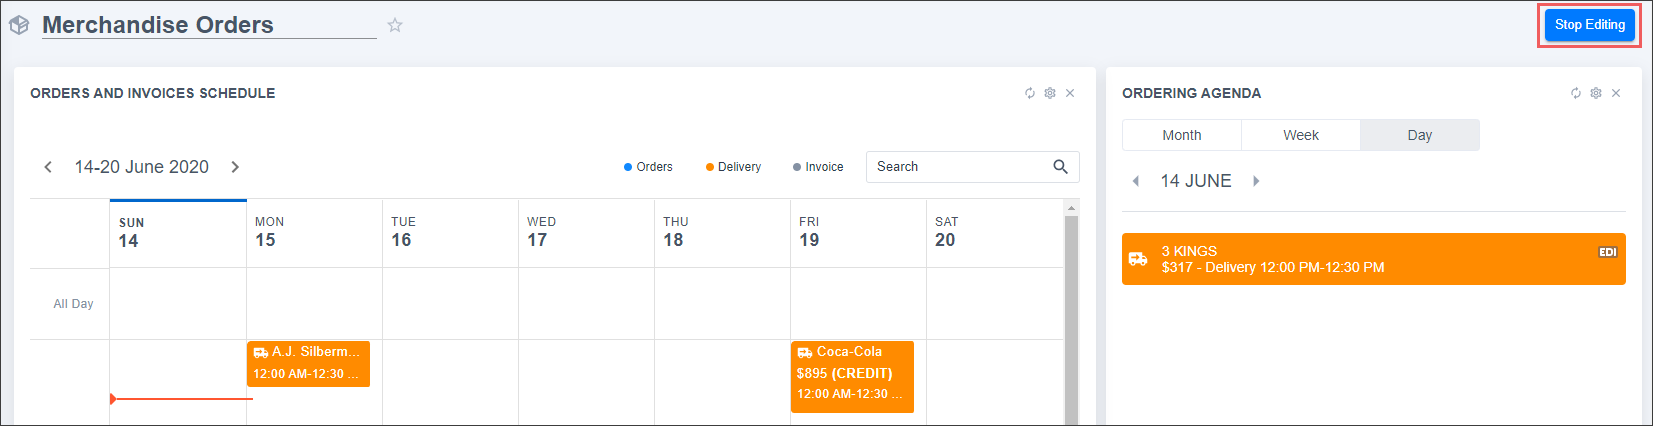
Changing the Widget Position
You can move widgets across the dashboard. For example, if information in some widget is important to you, you can move this widget to the top of the dashboard.
To move a widget in the dashboard:
- At the top right of the dashboard, to the right of the Add Widget button, click the dots icon and select Edit Dashboard.
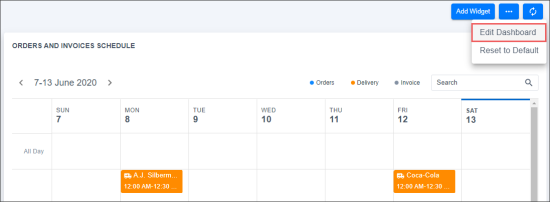
Result: The dashboard is in the editing mode.
- Drag and drop the widget to the necessary position in the dashboard.
- Once ready, at the top right of the dashboard, click Stop Editing.
Result: The dashboard is in normal operational mode.

Resetting the Dashboard
You can reset the dashboard to bring it to its initial state. All widgets in the dashboard will be back to their default positions.
To reset the dashboard, at the top right of the dashboard, to the right of the Add Widget button, click the dots icon and select Reset to Default. In the displayed window, click OK to confirm the reset operation.
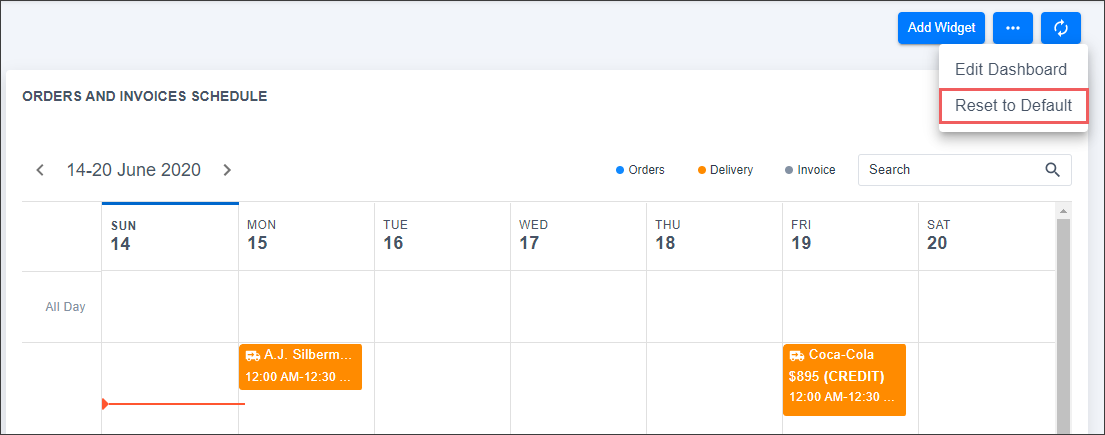
When you reset the dashboard, CStoreOffice® recalculates data for top vendors to be displayed in the dashboard.
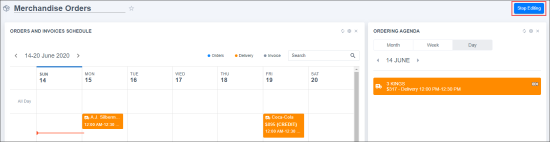
Changing the Reporting Period
By default, the Ordering Agenda and Orders and Invoices Timeline widgets display the list of events for the current day and week. If necessary, you can change the reporting period.
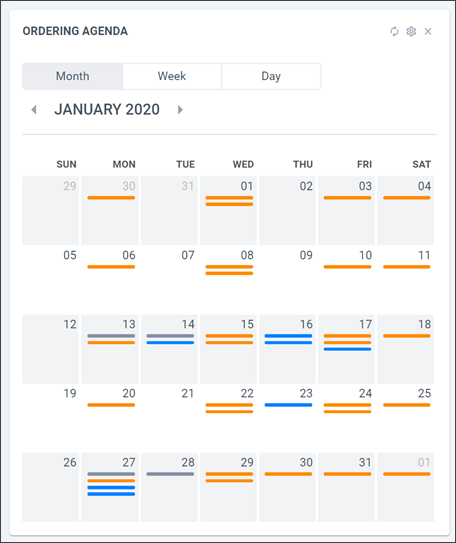
For the Ordering Agenda widget:
- To display data for a greater period, at the top of the widget, click the Week or Month tab.
- To get to the previous or next period, use the arrow icons to the left and to the right of the period name.
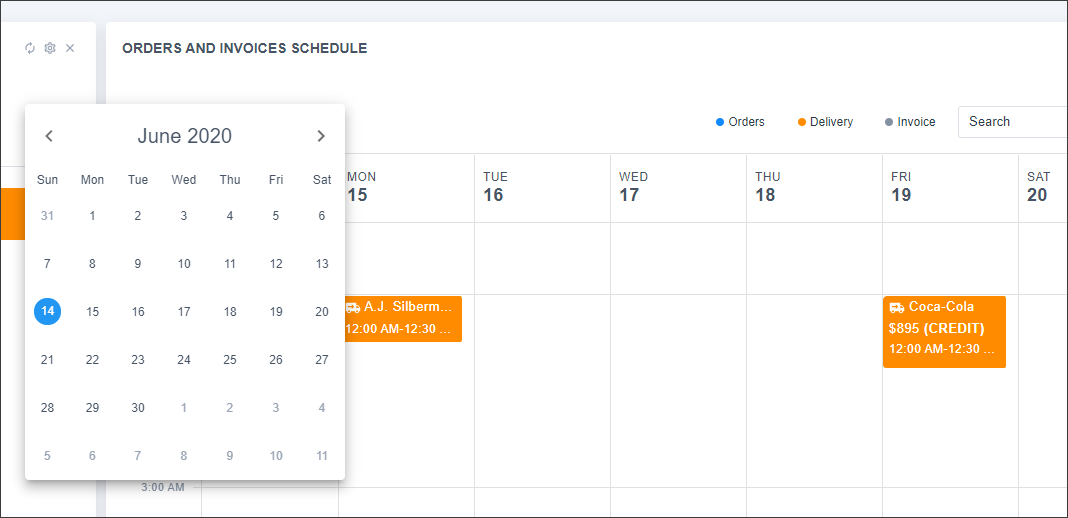
For the Orders and Invoices Schedule or Orders and Invoices Timeline widget:
- To select the necessary period, at the top of the widget, click the week and select the date in the calendar.
- To get to the previous or next week, use the arrow icons to the left and to the right of the period name.
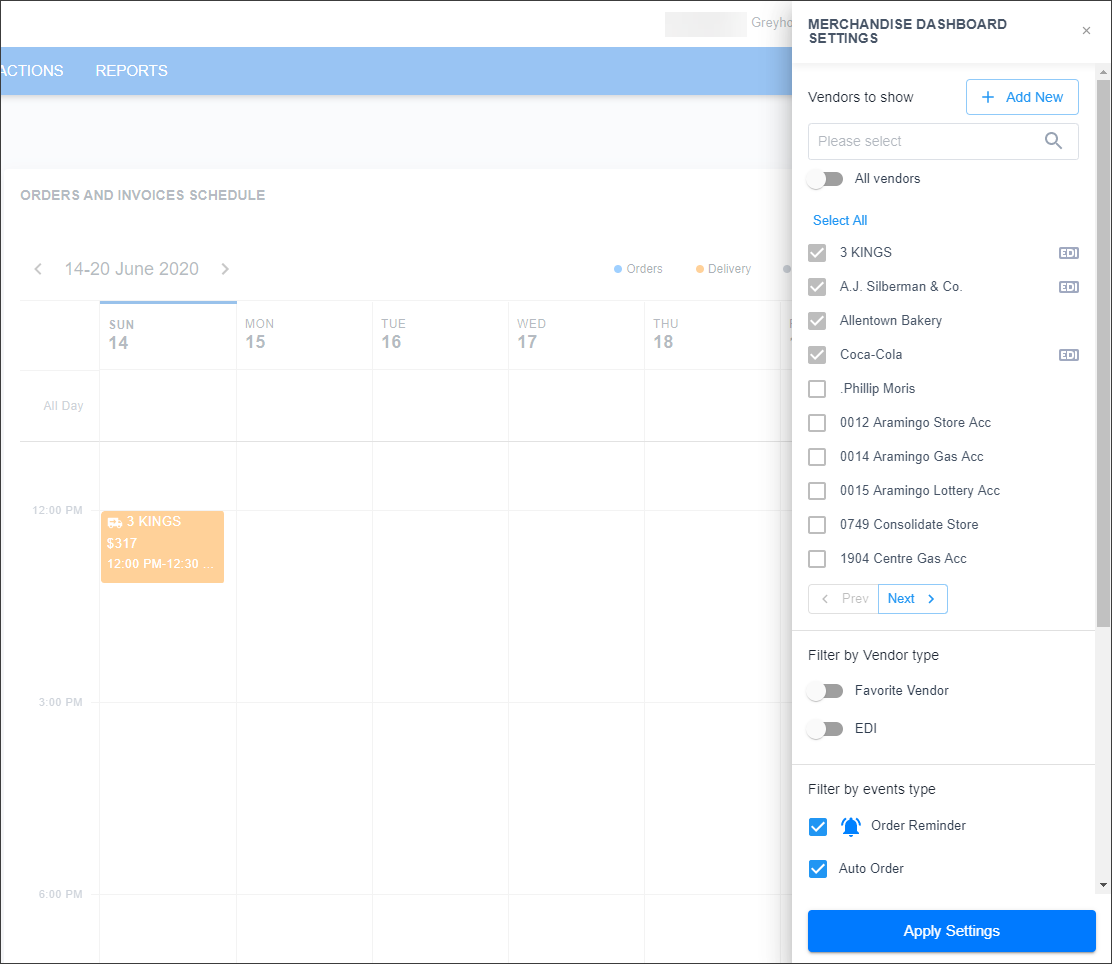
Selecting Data to Display in the Widget
You can customize the Ordering Agenda, Orders and Invoices Schedule, and Orders and Invoices Timeline widgets to display the data you need, for example, events of certain types or for certain vendors.
To customize the widget:
- At the top right of the widget, click the gear icon.
- In the Merchandise Dashboard Settings pane to the right, specify what data you want to display in the widget:
- In the Vendors to show section, select check boxes next to vendors whose events you want to display. To find the vendor, in the search field at the top of the field, start typing the vendor name or vendor ID, and the dashboard will filter the list of vendors by the entered search value.
You can add a new vendor to the system directly from the Merchandise Dashboard Settings pane. To do this, at the top of the pane, click Add New. For more details on vendor adding, see Setting Up Vendors.
- In the Filter by Vendor type section, use the Favorite Vendor and EDI toggles to display only favorite and EDI vendor events in the dashboard.
- In the Filter by events type section, select check boxes next to events you want to display in the widget.
- In the Order/Invoice Sum section, select what amount must be displayed in the widget: Retail or Cost.
- In the Sort orders by section, select by which criteria you want to order orders: Smallest to Biggest or Biggest to Smallest.
- At the bottom of the pane, click Apply Settings.
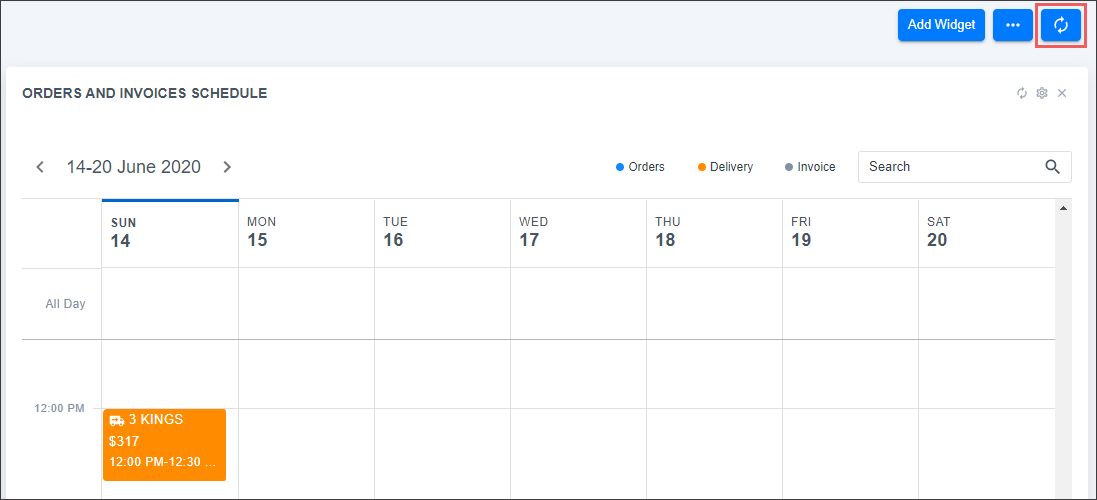
Refreshing Data in Widgets
At present, data in widgets is not refreshed automatically. If you have changed something in CStoreOffice®, for example, created a new vendor, and want to display the new data in the widget, at the top right of the widget, click the refresh icon.

To refresh data in all widgets at a time, at the top right of the dashboard, click the refresh icon.