The Retail Change Management module of the Import Tool lets you analyze GPM and conveniently set up optimal pricing in the stores. You can use this module to perform the following activities:
- Understand the store GPM based on:
- Negotiated cost and max recommended retail
- Current retail and actual, promotion or negotiated cost
- New current retail and negotiated cost
- Change retail prices for items in bulk
- Analyze the projected GPM based on the new current retail before making changes in the Price Book
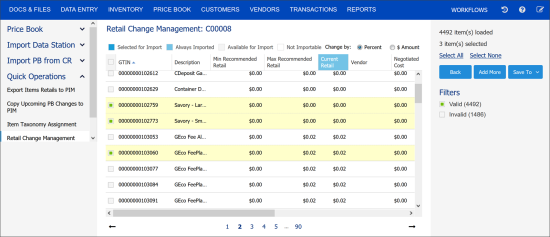
Please note that in the Retail Change Management tool, you can view the items data only for one selected station. If several stations are selected the items data are displayed randomly for only one of the selected station.
Working with GPM and Retail Prices
To analyze GPM and work with retail prices in the Import Tool:
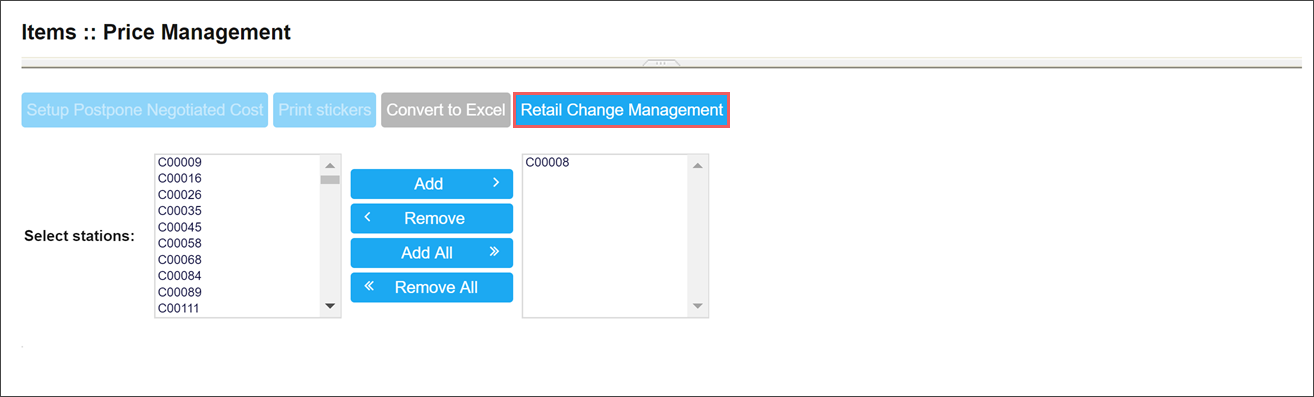
- Go to Price Book > Items. In the Items form, click Price Management and then in the Items : Price Management form, click Retail Change Management.

If you have access to the Import Tool, you can also go to Price Book > Import Tool > Quick Operations > Retail Change Management.
- At the Location step, select the location whose data you want to analyze and change and then click Next.

- In the right pane of the module, click Add More and select the source from which you want to load items data. You can load the data from the following sources:

- Location Price Book: You can import data from the Price Book in the selected location. In the right pane of the module, set up the filter for items that you want to import. You can use the following filtering options:
- In the Items to load field, specify how many items you want to load.
- From the Vendor list, select one or more vendors from whom the items are purchased.
- From the Manufacturer list, select the items manufacturers.
- From the Department list, select one or more departments to which the items belong.
- From the Category list, select one or more categories to which the items belong.
- From the Price Group list, select one or more price groups to which the items are added.
- From the Promo Group list, select one or more promo groups to which the items are added.
- From the Lottery list, select an option of how lottery items must be processed. You can skip lottery items, include them or import only lottery items.
- Select the Active Data check box to import only active items.
- Select the Is Not for Sale check box to import items that are not for sale.
- In the UPC field, specify the item UPC.
- In the Size field, specify the item size.
- In the Name field, specify the item name.
- From file: You can import items from a file in the CSV or XLS format. Click Browse and select the necessary file.
- At the top of the right pane, click Load Data Source.

Result: The items data is loaded in the draft of the Import Tool.
- Once the items data is loaded, you can perform the following activities:


Analyzing the GPM for Items
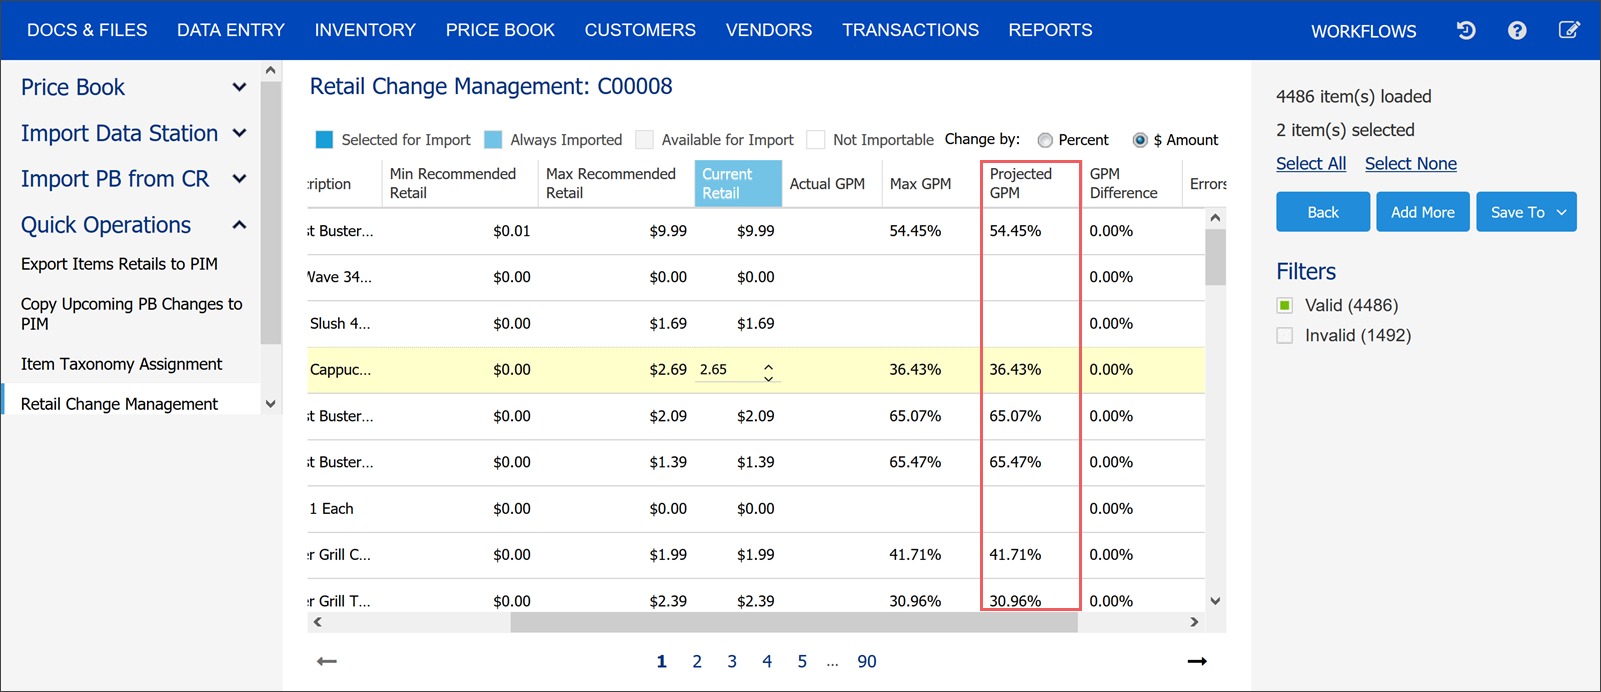
To analyze the items GPM, you can check values in the following fields in the items list:
- Actual GPM: Regular GPM value. To learn how actual GPM is calculated, see Petrosoft University Portal > CStoreOffice® > Accounting > About Accounting > GPM Calculation.
- Max GPM: The Max GPM is calculated by the following formula:
Max GPM = ((Max Recommended Retail − Negotiated Cost)/Max Recommended Retail)∗100%
- Projected GPM: The Projected GPM is calculated by the following formula:
Projected GPM = ((Current Retail − Cost*)/Current Retail))∗100%
* As the Cost value, CStoreOffice® uses one of the following values (starting from the highest priority):
- Promotion cost
- Actual cost specified in the invoice
- Negotiated cost
- GPM Difference: The GPM Difference is calculated by the following formula:
GPM Difference = Current GPM based on data existing in the database – Current GPM based on the value entered in the Import Tool draft


Setting New Current Retails for Items
With the Retail Change Management module, you can change the current retail prices for several items at once.
To set new current retail prices for items:
- At the top of the items list, select the option for changing the current retail prices:
- Percent: Select this option to change the current retail price by a specific percent rate.
- Amount: Select this option to change the current retail price by a specific amount.
- In the items list, select the check box next to the item whose current retail price you want to change. You can select several items at once.
- In the Current Retail field, specify the percent rate or amount for changing the current retail price.
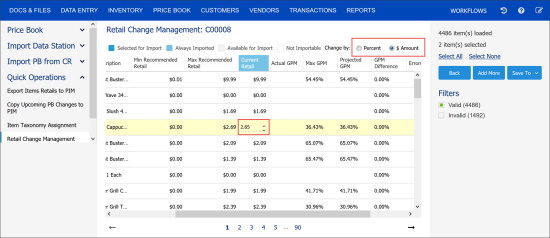
You can change the current retail price by entering the necessary projected GPM value in the Projected GPM field. In this case, the Import Tool will re-calculate the current retail price based on the GPM value you set up.
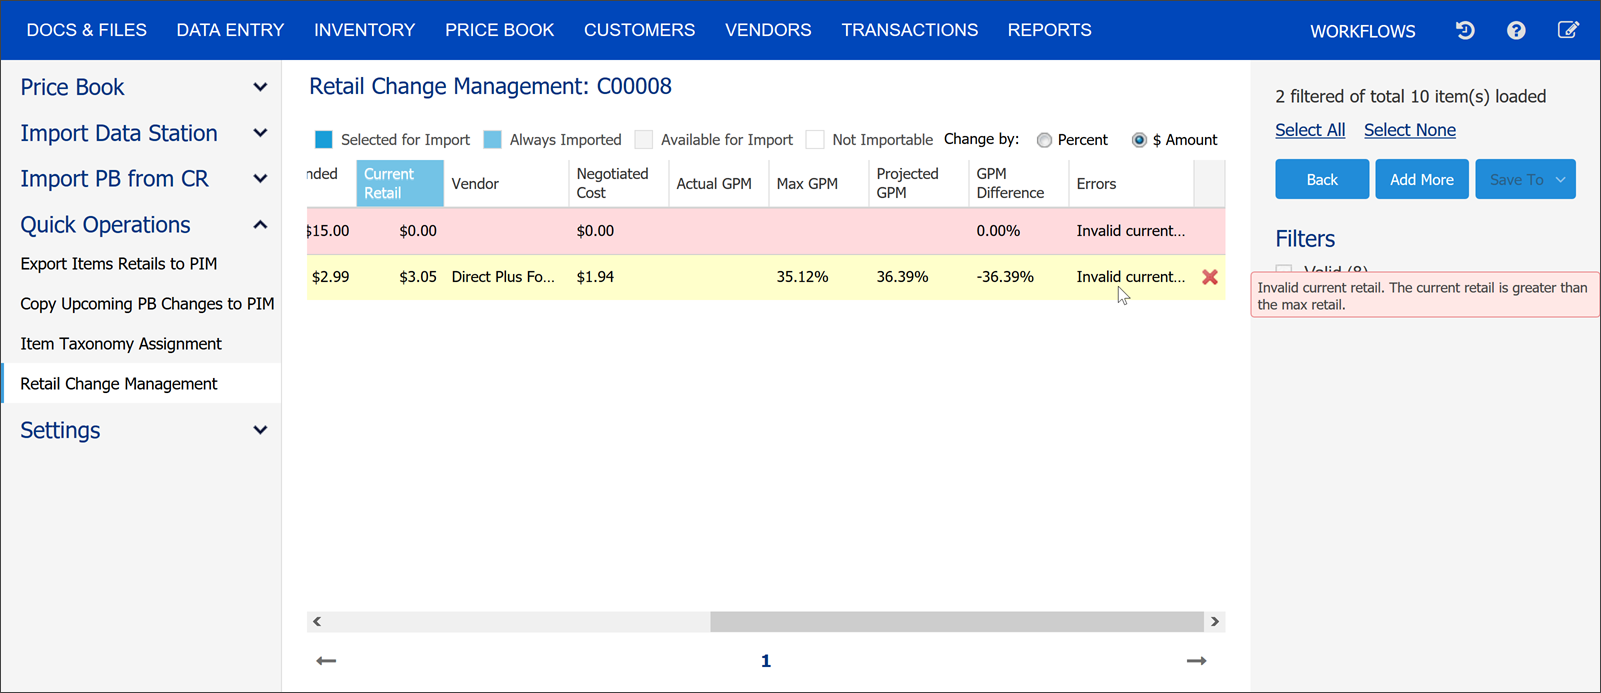
When you set a new current retail price for an item, the Import Tool validates if the new price is within the range set by the Min Recommended Retail and Max Recommended Retail values. If the new price falls out of this range, the Import Tool marks the item as invalid and moves it to the Invalid items section. Retail prices for invalid items are not exported to the destination locations.

- As soon as you set the new retail price, the Import Tool re-calculates the Projected GPM value for the item. Check the Projected GPM field to make sure the value is correct and meets your needs.

- To export the changed retail prices to destination locations, in the right pane of the module, click Save To and select one of the following options:

- Locations: Select the check boxes next to locations where new retail prices must be exported.
- Location tags: Select the check boxes next to tags assigned to locations where new retail prices must be exported.
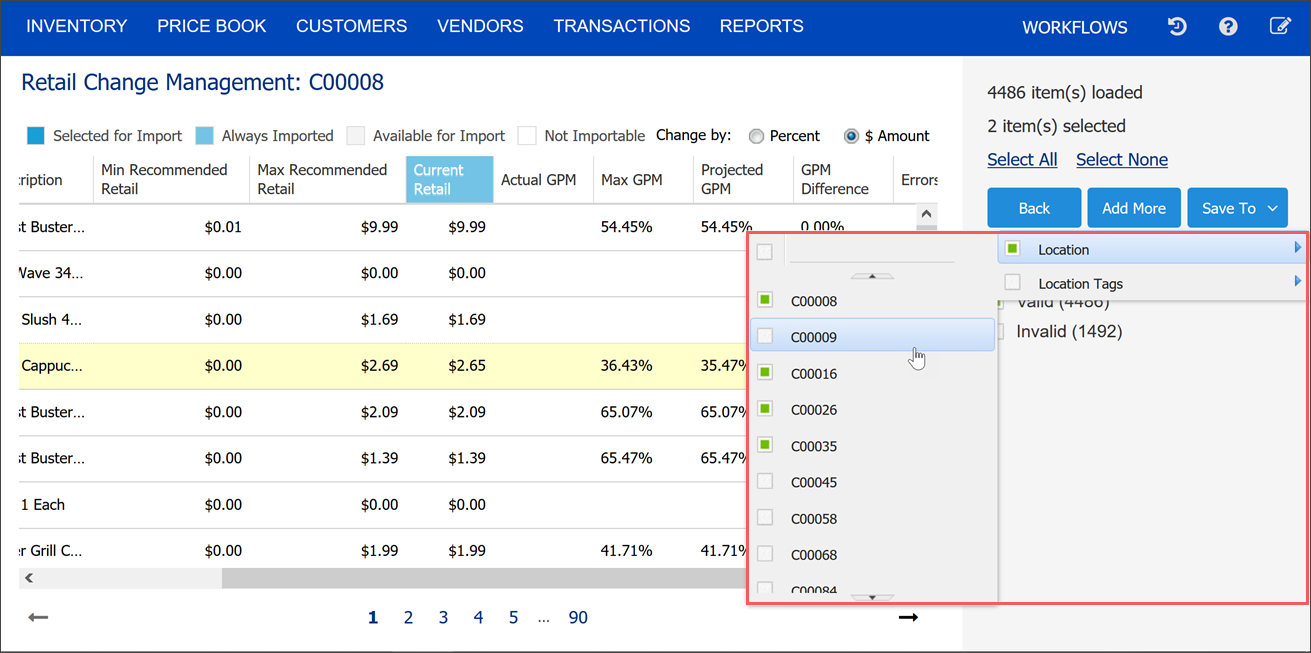
- Click Save To once again.
Result: The Import Tool exports the changed retail prices to the selected locations and displays the export results.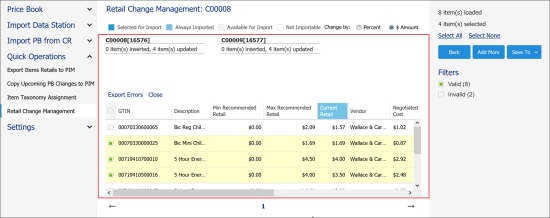
During the export process, some retail prices may fail to be exported to specific locations. This can happen, in particular, if the items data does not comply with the validation rules, and you do not change the items data in the Import Tool draft to match these rules.
You can export information about all errors that occurred during the export process to a file. To do this, at the final step of the export process, click Export Errors. The Import Tool will download a file with the following information:

- Location name
- Item UPC
- Detailed error description
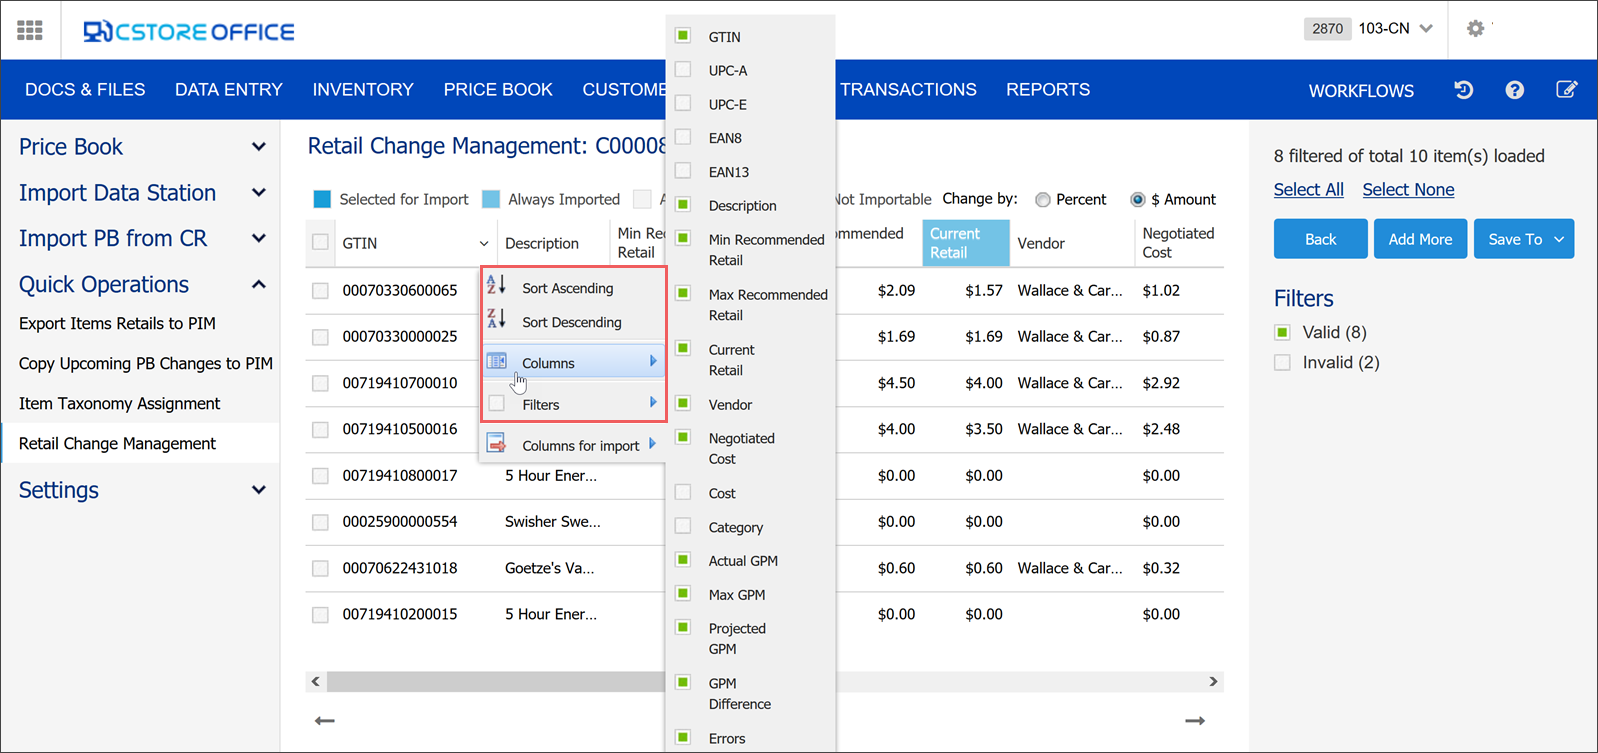
Sorting and Filtering Items
To facilitate work with items whose retail prices you want to analyze and change, you can sort and filter items in the Retail Change Management module.
- To sort items by a specific value in the ascending or descending order, click the necessary column name once or twice. Alternatively, you can click the arrow icon to the right of the necessary column and select Sort Ascending or Sort Descending.
- To filter items by a specific value, to the right of the necessary column, click the arrow icon and select the check boxes next to the values by which you want to filter the items list.