


To export the items retails to PIM:
- In the Import Tool, go to Operational Menu > Quick Operations > Export Items Retails to PIM.
- At the first step, select the source from which you want to export the items retails:
- To export items retails from a location, in the Location list, select the location from which you want to import the items retails.
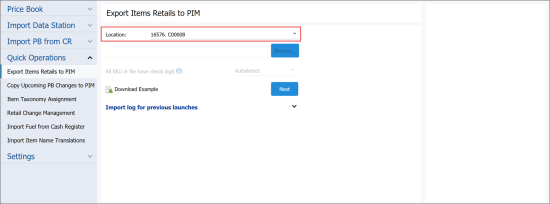
- To export items retails from a file, click Browse and select the file with the items retails. Then, in the All SKU in file have check digit list, select one of the following options:
- Autodetect: Select this option if you want the Import Tool to automatically detect the SKU format.
- Yes: Select this option if all SKUs in the file have the check digits. Note that if any SKUs in the file are specified without the check digit, the will not be able to recognize such items and will not export them to .
- No: Select this option if at least one SKU in the file does not have the check digit. In this case, the Import Tool will ignore the check digits in SKUs.


- At the bottom of the form, click Next.
- Wait until items retails data is imported to the buffer table.
- If necessary, update the data in the buffer table. For example, you can do the following:
- Update the item's retail data: In the column with retail or cost data, click the item value and enter a new value.
- Update the item status: In the Status column, select the item status — Active or Delisted.
- Remove the item from the list: In the last column, hover over the row with item you need to delete and then click the Remove icon.
- Forbid the recommended retail price change for the item: In the Apply Recommended Retail column, select the necessary value.
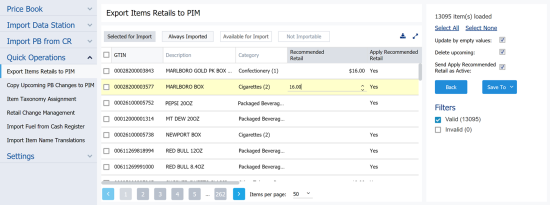
- In the draft, select check boxes to the left of items whose retails you want to export.
- In the right pane, specify the data export options:

- Update by empty values: Use this option to replace existing values in the destination locations with empty values set for items in the draft.
- Delete upcoming: Use this option to delete upcoming retail values in the destination locations.
- Send Apply Recommended Retail as Active: Use this option to forcibly set the Apply Recommended Retail option to enabled for items in the destination locations. With this option enabled, the Import Tool will also export the Recommended Retail value for items whose data is exported.
- To the right of the Save To button, click the drop down list.
- Select the locations to which you want to export items retails. You have the following export options:
- You can export the item retails by tags. To do this, in the tags tree, select the necessary tags. As a result, the item retails will be exported to all locations to which this tag is assigned.
- You can export the item retails to a specific location or locations. To do this, expand the tags tree and select locations to which you want to export the item retails. The list of locations under tags contains only those locations to which your account is subscribed.
To quickly find the necessary tag or location, use the search field at the top of the tags tree: enter at least three first characters of the tag name and press ENTER on the keyboard.
- Click the Save To button.

- Wait until the retails of the selected items are exported to PIM. The import status is displayed at the top of the form.


For more information on how to view the import status, see Viewing the Export Items Retails Report.


