


- Go to Customers > Sales Invoices.
- At the top right of the Sales Invoices list, click the Add icon.
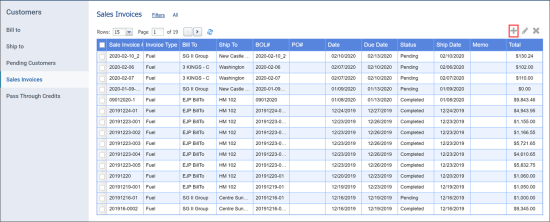
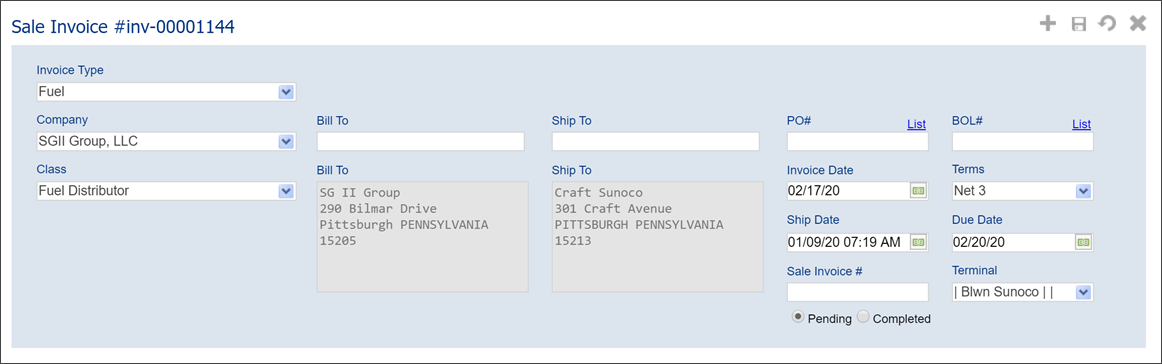
- In the Sale Invoice form, do the following:
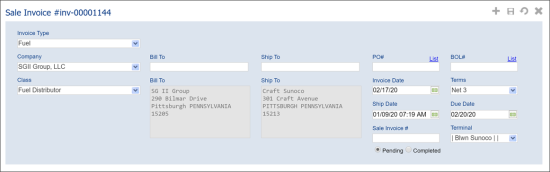
- Make sure the Company and Class fields contain correct values.
- In the BOL# field, start typing the number of the BOL you have created and then select it from the list. You can select the PO number instead in the PO# field.
Wait until all the corresponding data is populated, including the values in the Bill To and Ship To fields.
- In the Invoice Date field, select the invoice date.
- From the Terms list, select the invoice terms.
- Make sure the Ship Date and Due Date fields contain correct invoice dates.
- In the Sale invoice # field, enter the invoice number. Use the value from the BOL# field for transparency.
- Make sure the Terminal field contains correct value.
- The Products section will be automatically populated with products from the BOL. If necessary, you can update the following valuers for each fuel product:
- Fuel product type
- Description
- Total quantity
- Price per unit
- Total price (quantity multiplied by unit price)
- To provide information for the customer, fill in Customer Message and Memo fields.
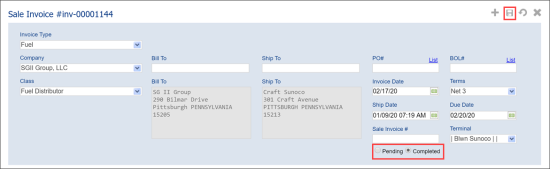
- Go to the top of the Sale invoice form and then do the following:
- Select the Completed option to change the invoice status to Completed.
- At the top right of the form, click the Save icon.

To save the updated values, click the enter button.


