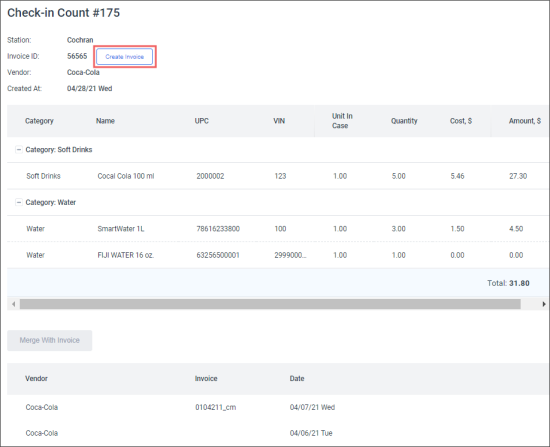
To create a new invoice based on the check-in count:
- On the CStoreOffice® home page, in the Pending Invoices section in the left part of the screen, select the location.
Result: The Pending Invoices report is displayed. - In the Check-ins Count section at the bottom of the report, click the row for the check-in count you want to convert to the invoice.
Result: The Check-in Count form opens. - Click Create Invoice.
As soon as you click the Create Invoice button and complete the invoice creation, the check-in count will be converted to the invoice and will disappear from the list of unaudited check-ins. You can edit the invoice, but you cannot convert it back to check-in count.

Result: A new invoice opens. It contains all the scanned products. By default, it has the same name as the Invoice ID from the scanner and is marked as Complete. - Review the invoice and make any changes if necessary (optional). The form is the same as a regular form for manually entering invoices. The changes you make are automatically saved. You can:
- Edit the invoice settings above the list of products.
- Edit each product. To do this, click the product, make changes, and then click enter in the same row; or click delete to remove the product.
- Add new products. To do this, click the last row, enter details, and then click enter in the same row.
The new invoice appears in the Current Invoices list. The number of the check-in count from which the invoice was created is displayed in the Check-in # column.
You may need to press F5 on your keyboard to refresh the Pending Invoices report page and view the latest changes.
To view the details of the invoice, click its name.
To view the details of the check-in count, click the check-in count number.

