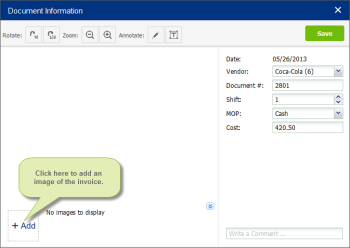
To adjust the scanner settings:
- From the CStoreOffice® home page, go to Docs and Files > Docs Scanner. .
- To the right of the calendar, click New Document.
- At the bottom right corner of the Document Information window, click +Add.
- On the Scan Document button, click the gear icon.
- Click the gear icon for the scanner you are using.
- In the displayed window, adjust the scanner settings:
- Resolution: Usually the default resolution 300 DPI (dot per inch) is enough. However, if you have an older model of the scanner, you may need to select higher resolution for better image quality. You may want to select lower resolution of 200 DPI if you need to decrease the file size and scanning time, even with some quality loss.
- Color Type: Possible values:
- RGB: Selected by default. Produces colored images.
- GRAY: produces black and white images. Select this color type to decrease the file size and scanning time.
- Paper Size: The values include all paper sizes supported by the scanner. By default, one of the most commonly used ones is selected: USLETTER, USLEGAL or A4. Select the paper size you are actually using to ensure the correct size and position of the content.
- Scanning Source: The values depend on the scanner model. Possible values:
- Auto: The default value that automatically selects the optimal scanning source. In some cases, however, you may need to select the source manually.
- ADF: Select this source if your scanner has an automatic document feeder to scan several pages at once.
- Flatbed: Select this value for regular scanners where you need to feed images and scan them one by one.


