You can create an ACH payment only if your customer supports this method of payment.
If you need to enable the ACH payments for your customer in CStoreOffice®, go the Bill To form. For details, see Entering Billing Information.
To create an ACH payment or transaction for your customer:
- From the CStoreOffice® main menu, go to Customers > Accounts Receivable > New Accounts Receivable.
- In the Receive Payments form:
- In the Company list, select your company.
- In the Class list, select the class from the list of classes available for the selected company.
- In the Customer list, select the customer which payment you need to add.
- At the top of the form, select the Create ACH Transaction option.
- In the Open Customers Invoices list > Receive Payments column, select the invoices you need to pay within this payment. The receive payments total is displayed at the bottom of the column.
- If you want to use credits for paying the invoice, in the Open Customers Invoices list > Apply Credits column, select the corresponding value or enter it manually.
- In the Customer Credits list, select the credits you need to use for paying the invoices selected in the Open Customers Invoices list.
- In the Effective Date field, select the date of the payment.
- In the A/R Account list, select the account for the payment.
- Make sure the value in the Receive Payments field is calculated properly.
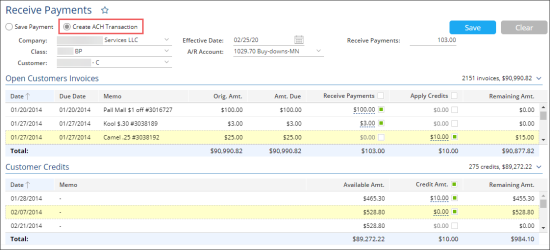
- At the top right of the form, click the Save button.
The Customer list contains only customers having open invoices or credits. In case the list is empty, there are no customers with open invoices or credits within the selected class.
In case this option is disabled, it means that the ACH payments are not enabled in CStoreOffice® for your customer. To enable ACH payments, go to the Bill To form. For details, see Entering Billing Information.
If you need to pay part of the invoice, you can enter the Receive Payments value manually by clicking the field with value. The Receive Payments value should not exceed the Amt. Due value for the invoice.
The value selected or entered in the Apply Credits column, will be automatically added to the Credit Amt. value in the Customer Credits list.
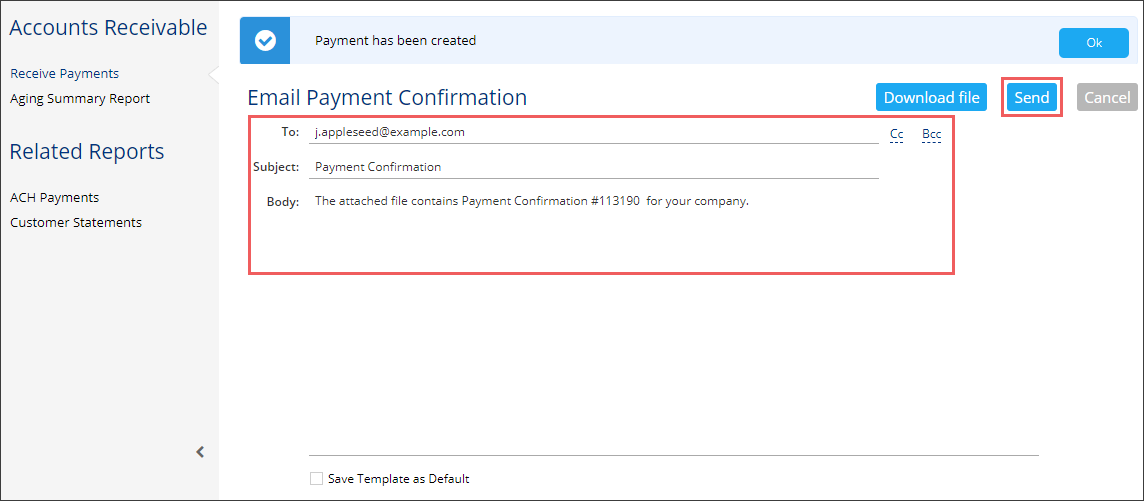
- In the Email Payment Confirmation form, enter the following data to inform your customer about the payment:
- In the To field, enter the customer's email.
- In the Subject field, enter any additional information to the default value, if needed.
- In the Body field, enter any additional comments you want to send to your customer about the payment.
- Select the Save Template as Default option, if you need to save this email as the default email confirmation for further payments.
- If you need to keep a copy of the payment confirmation locally to track the payments history or to resend the confirmation in case your customer has lost or not received it, you may download it before sending. Click the Download file button and save the payment confirmation on your computer.
-
At the top right of the form, click the Send button.

Result: The Receive Payments form opens back. A customer will immediately receive the payment confirmation.