To learn how to prepare the cash register for CStoreOffice®, select the cash register that is at the site:
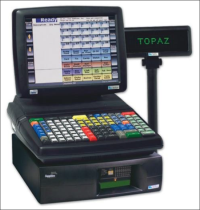
An example of a Verifone Sapphire with a Ruby / Topaz screen is shown in the image below:

Keep in mind that the set-up at the store location may not look exactly like this:
- On the counter, you may just have the touch screen or Ruby.
- While the Sapphire box may be located under the counter or in the back office.
Preparation Step
Prior to the installation appointment, do the following:
- Locate the Sapphire Register Router at the Site
Step Details
Every Sapphire Register has a router that facilitates communication between all equipment in the cash register ecosystem. Locate the following router:
- Cybera SCA325 router

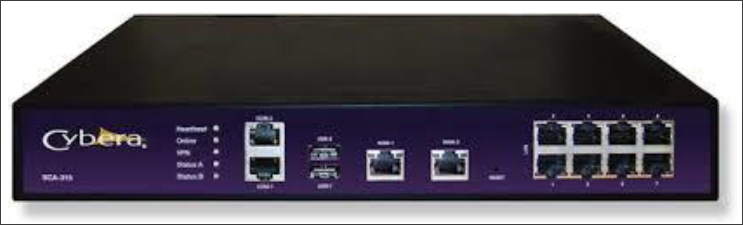
Keep in mind, in rare cases this router may not be a Cybera SCA325 router, but may be a different router.
- Locate the Sapphire box as it is shown in the image below.
- Look at the back of the Sapphire box and find the ETHERNET ONLY port.
- Find the Ethernet cable plugged into the ETHERNET ONLY port.
Result: The other side of the Ethernet cable should be plugged into the Verifone register router.
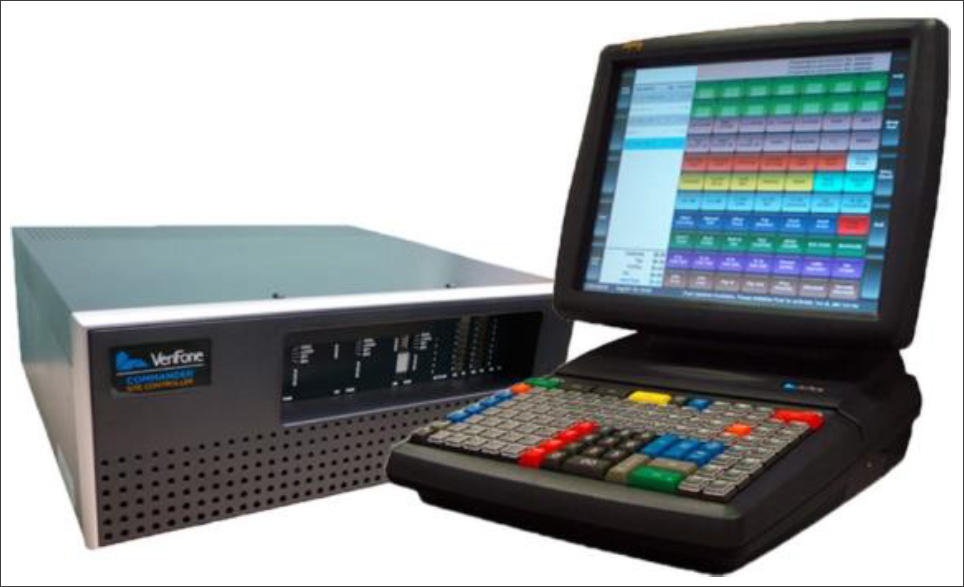
An example of a Verifone Commander with a Ruby CI is shown in the image below:
Preparation Steps
Prior to the installation appointment, do the following:
Steps Details
Creating CSO User on Cash Register
- Access the Petroleum/C-Store Control Center by opening a web browser and navigating to the appropriate URL.
It should look like Https://<cash register IP address>/ConfigClient.html - Sign in to the web UI using your manager’s credentials.
- Click Security and select Manage Users.
- Enter the 4-digit one-time password (OTP) code. Read _How to generate OTP code?_ below for details.
- Add a new user with the following parameters:
- Name: cso
- Roles: select all roles
- Password Settings \ Min.Length: 7
- Password Settings \ Max.Length: 15
- Password Settings \ # of Days to Expire: 0
- Password Settings \ New Password: some secure password
- Password Settings \ Confirm Password: same password
- Click Save.
- Go to the Main Register, if you have more than one registers at the location.
- On register's screen, locate CSR Function menu.
- Go to option #4 - Maintenance.
- On Maintenance menu, go to line #10 - Generate Config OTP.
- Follow the on-screen instructions to generate a 4-digit OTP code.
Locating Commander Register Router at Site
Every Commander Register has a router that facilitates communication between all equipment in the cash register ecosystem. Locate the following router:
- Cybera SCA325 router
If you are unable to locate your commander register router or you are unsure if you have found the correct device, contact your cash register technician for assistance.
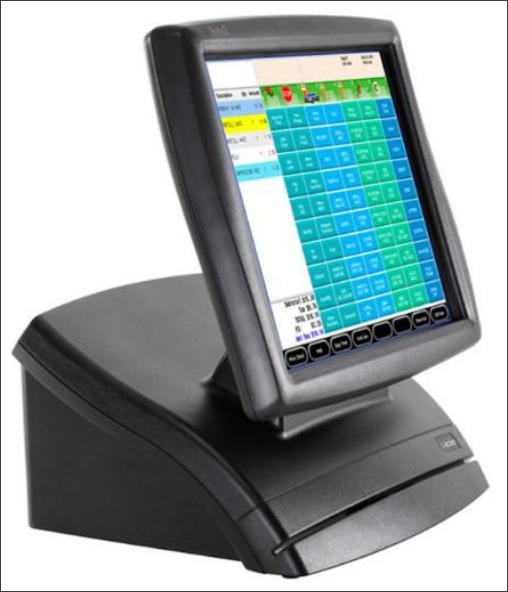
An example of a Verifone Commander with a Topaz Screen is shown in the image below:
Keep in mind that the set-up at the store location may not look exactly like this:
- On the counter itself, you may just have the touch screen.
- While the Commander box may be located under the counter or in the back office.
Preparation Step
Prior to the installation appointment, do the following:
- Locate the Commander Register Router at the Site
Step Details
Every Commander Register has a router that facilitates communication between all equipment in the cash register ecosystem. Locate the following router:
- Cybera SCA325 router
If you are unable to locate your commander register router or you are unsure if you have found the correct device, contact your cash register technician for assistance.
Preparation Steps
Prior to the installation appointment, do the following:
- Change the back office settings on the cash register.
- Locate the Passport register router at the site.
- Configure the Passport register router.
Steps Details
Changing Back Office Settings on Cash Register
You need to apply specific settings on your cash register, to pull the information out of the cash register and send it to CStoreOffice® properly.
Setting up the specific settings directly on the cash register will prevent you from ringing up any purchases.
You will need about 10 minutes to set up the specific settings on your cash register.
- Make sure that you are physically at the site and have access to the main Passport register.
- Verify that you have the proper permissions on the register to change the necessary settings.
- Sign into cash register, using the Manager role or the role with higher permissions.
To set up the specific settings on your register, follow the steps:
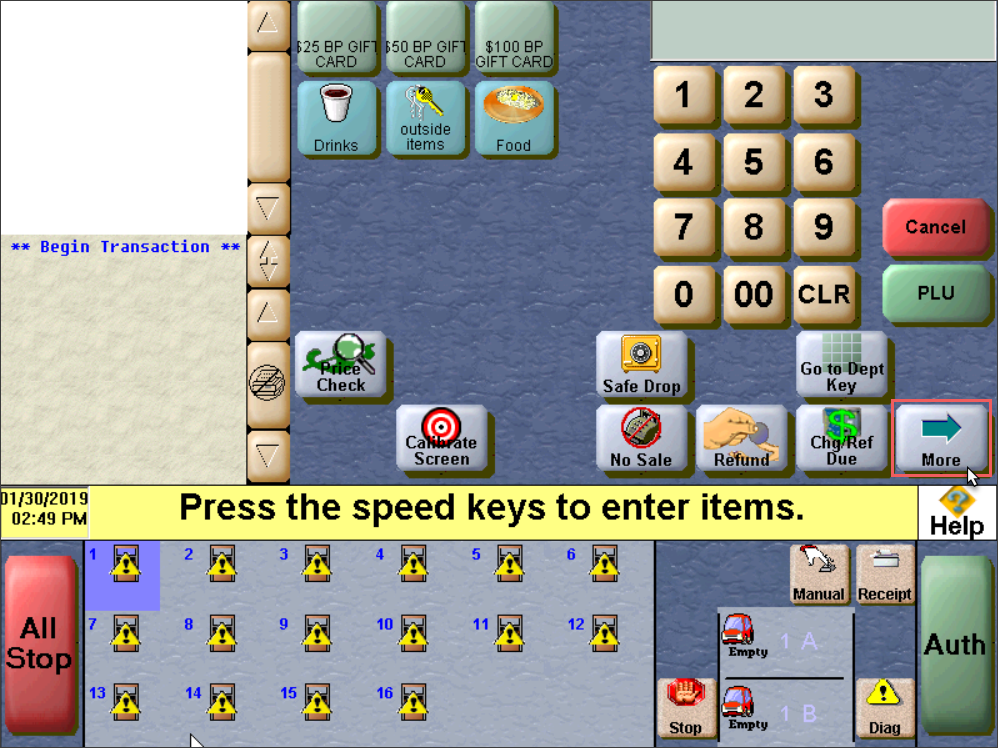
- In the main sales screen, tap More.

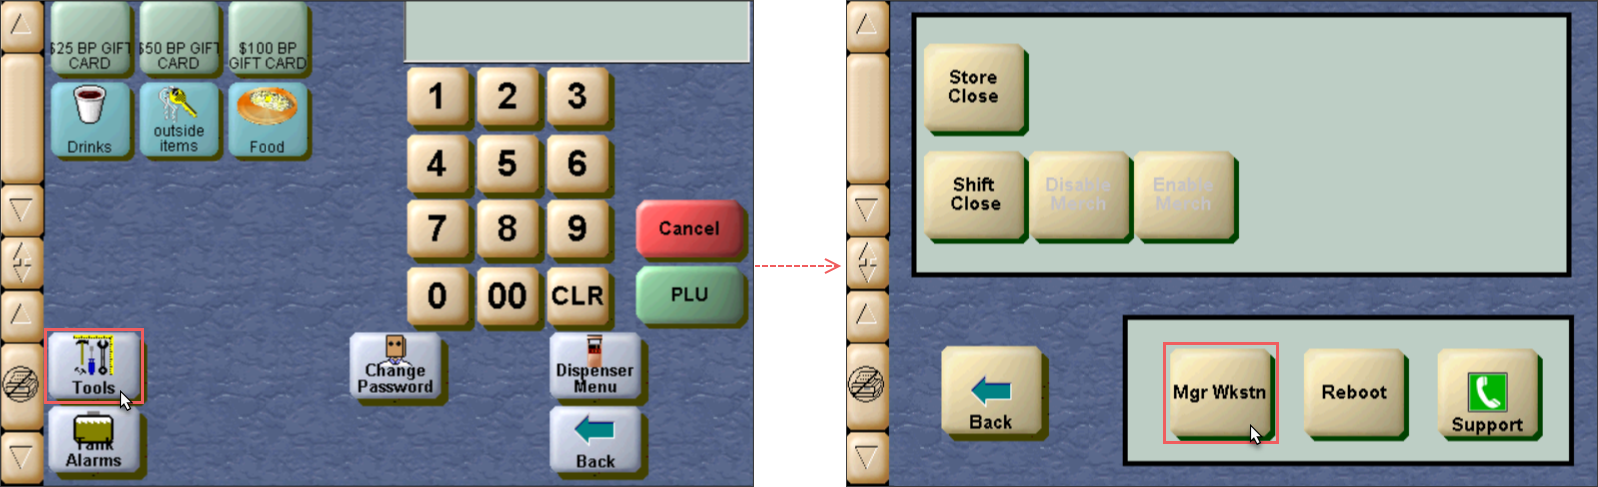
Result: The Tools button is displayed. If not, tap More again. - Tap Tools > Mgr Wkstn.
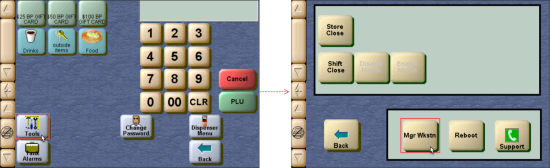
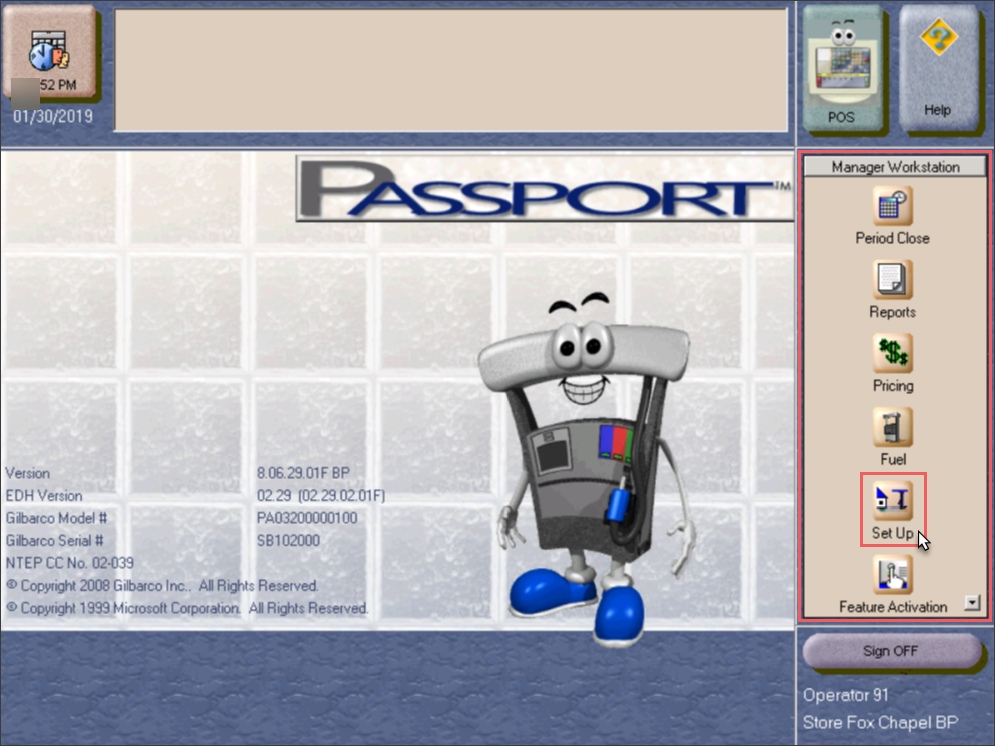
Result: A new screen opens. - Go to the Manager Workstation section and then tap Set Up.

- Inside Set Up, select Store.
- Tap the drop-down arrow to scroll down until you find Back Office. Select Back Office.
- Select Back Office Interface.
- Change Interface format to NACS XML v3.4.
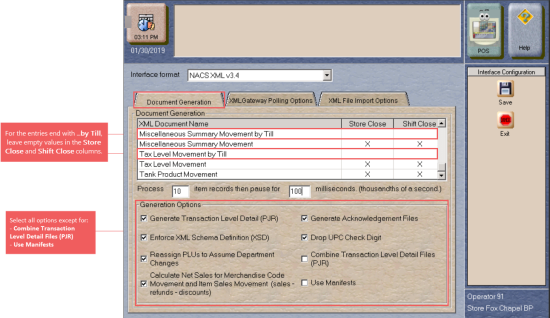
- In the Document Generation tab, do the following:
- For each entry in the Document Generation table, do the following:
- If the entry name ends with the words by Till, then skip it.
- If the entry name does not end with the words by Till, in the Store Close and Shift Close columns, type X.
- In the text fields below the table, type 300 and 10 values to get the following sentence:
Process 300 item records then pause for 10 milliseconds (thousands of a second) - In the Generation Options section, select all options except for the following options:
- Combine Transaction Level Detail Files (PJR)
- Use Manifests

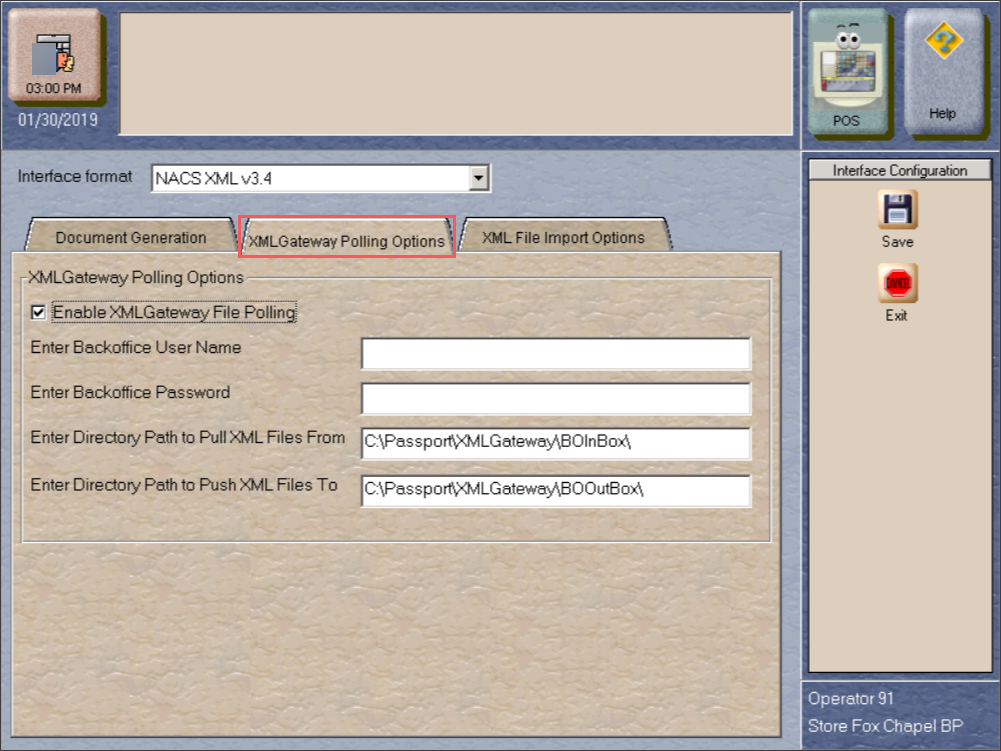
- Tap the XML Gateway Polling Options and then do the following:
- Make sure the Enable XMLGateway File Polling option is selected. If not - select it.
- Leave the following fields blank:
- Enter Backoffice User Name
- Enter Backoffice Password
- In the Enter Directory Path to Pull XML Files From field, type C:\Passport\XMLGateway\BOInBox\
- In the Enter Directory Path to Push XML Files To field, type C:\Passport\XMLGateway\BOOutBox\

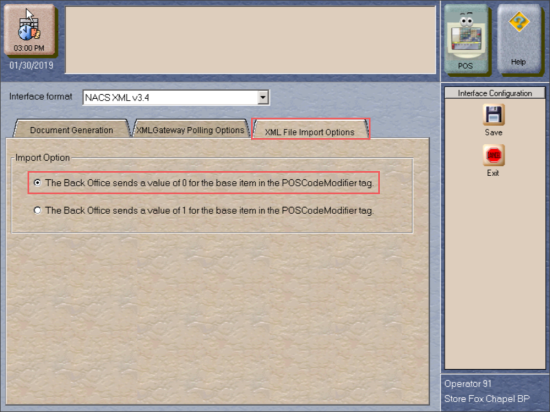
- Tap the XML File Import Options tab and then in the Import Option section, select The Back Office sends a value of 0 for the base item in the POSCodeModifier tag.
- In the Interface Configuration section, click Save.
Result: All settings are configured and saved. Tap Exit, to exit the Manager Workstation screen.

Locating Passport Register Router at Site
Every Gilbarco Register has a register router that facilitates communication between all equipment in the cash register ecosystem. This router, which is called a Cisco RV042, is shown in the image below.
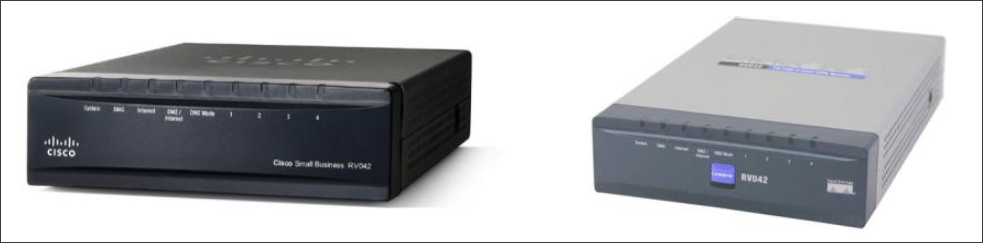
Before your installation appointment, do the following:
- Locate the Cisco RV042 router.
- Find the DMZ / Internet port, which is located on the back of the RV042.
- Verify that this port is not in use.
If there is an Ethernet cable plugged into this port, trace the cable to see what it plugs into.
Configuring Passport Register Router
When the RV042 is located, you need to verify that it is properly configured. Do the following:
Contact your Gilbarco Passport register technician or contact Gilbarco directly.
Verify the following RV042 settings or change them, if needed, in the following way:
- DMZ / Internet port is enabled.
- In the Firewall rules, the following options are set to Allow:
- BOSShare (Back Office Share)
- All traffic LAN
- Ensure that the LAN firewall rules has no selected Deny options.
- This lat setting depends on what Passport model is at the site.
- If it is a PX60 Passport or newer, then in the Port Forwarding settings page, BOSShare needs to use Port 445.
- If you have an older model Passport, then in the Port Forwarding settings page, BOSShare needs to use Port 139.


