


The procedure for installing the BT9000(PC) cash register includes the following steps:
- Set up the GL #2 account number.
- Set up the cash register settings.
- Set up the House Accounts data export.
Setting Up the GL #2 Account Number
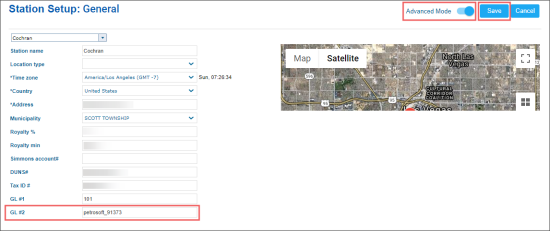
The GL #2 account number is used in the shift files as the file prefix. For example, the GL #2 account number which is equal to petrosoft_91323 is added to the shift files prefix as it is displayed in the image below.

To set up the GL #2 account number:
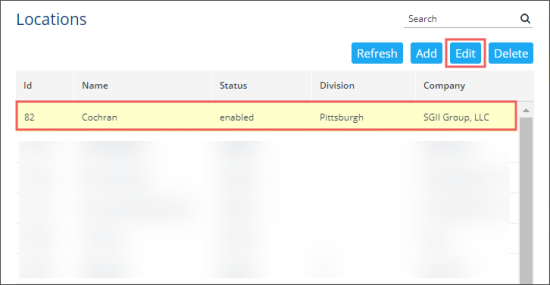
- From the CStoreOffice® main page, go to Settings > General > Locations.

Result: The Locations list opens. - In the Locations list, select the location at which you set up the cash register and click Edit.
Result: The Station Setup form opens. - In the Station Setup form:
- Set the Advanced Mode toggle to the On position.
- At the bottom of the form, in the GL #2 field, enter the GL #2 account number value.
- At the top right of the form, click the Save button.


Setting Up the Cash Register Settings
To set up the cash register settings:
- From the main CStoreOffice® menu, go to Data Entry > Dashboard > Station Options > Cash Register.
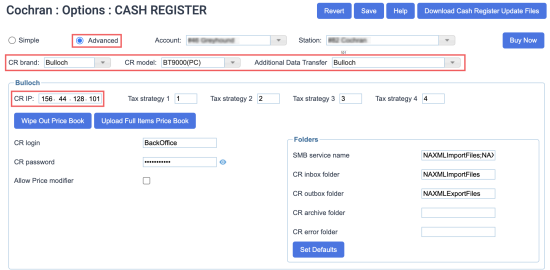
- In the cash register options form:
- Select Advanced.
- In the CR brand list, select the Bulloch value.
- In the CR model list, select the BT9000(PC) value.
- In the Additional Data Transfer list, select the Bulloch value.
In the Additional Data Transfer list, select the DC model to integrate ATG and/or LPA in your location. In this case, the Bulloch integration server will be used to exchange the data with your cash register. LPA is available only for DC 400 series.
- In the Direct Connect Options section:
- In the IP field, enter the 156.44.128.101 IP address.

- In the Shared Options section:
- In the Default CR product code field, make sure 400 is displayed. If not, change its value to 400.
- In the Apply CR taxation options, select by Items.
- In the Apply CR product codes options, select by Items.
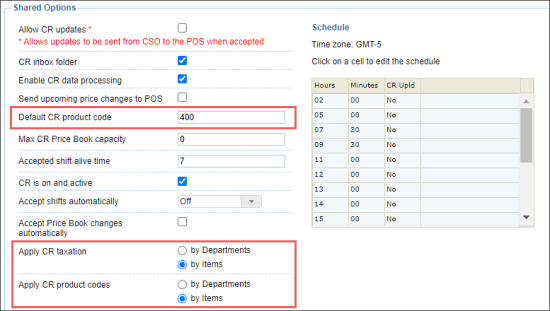
- At the top right of the form, click Save.

Setting Up the House Accounts Data Export
For the Bulloch BT9000(PC) CR model, the House Accounts data is exported to the BT9000 Price Book.xml file from the following fields in the Bill to form:
- GL#: This value is exported under the <Account Accounts_Number> tag.
- Name: This value is exported under the <English_Description> and <French_Description> tags.
Please note that only first 18 symbols are exported from the Name field.

  <Accounts_Receivable>
    <Account Accounts_Number = "213456">
    <English_Description>ATM - C</English_Description>
    <French_Description>ATM - C</French_Description>
	...
  </Accounts_Receivable>
For accurate export of the House Accounts data, make sure you keep the Name and GL # fields configured properly in the Bill to form. For more information about how to work with this form, see Bill To.


