You can activate DC-401 with the help of the DC-401 console utility. The console utility is designed to simplify work operations and configuration of DC-401.
To activate DC-401 with the console utility, you must perform the following activities:
Step 1. Place DC-401 and Connect it to Power and the Internet
To start off, you need to place DC-401 in the location where it will be used and connect it to power and the Internet.
For building the network infrastructure based on DC-401, refer to the diagrams below:
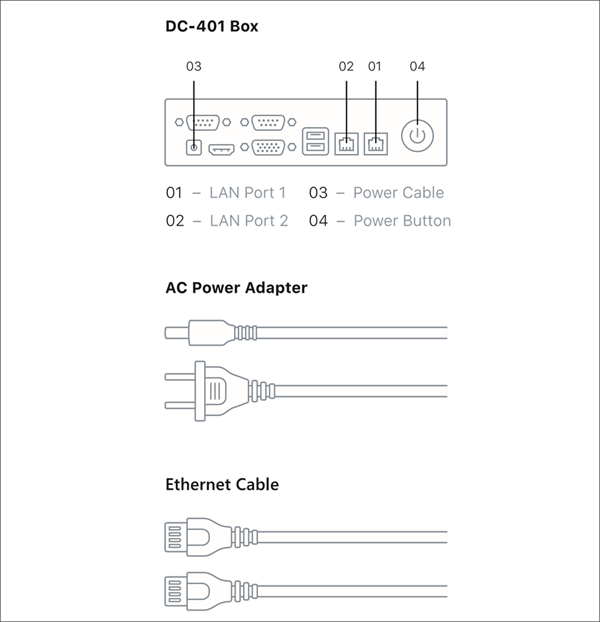
Diagram 1. DC-401 Ports and Cables

Diagram 2. DC-401 Connection Scheme
To place DC-401 and connect it to power and the Internet:
- Plug the network cable to the LAN Port 1 on DC-401(01).
- Connect your monitor and keyboard to the LAN Port 2 on DC-401 using the Ethernet cable (02).
- Connect DC-401 to the power using the power cable (03).
- Press the power button to start DC-401 (04).
Step 2. Activate DC-401 Using the Console Utility
To activate DC-401 using the console utility:
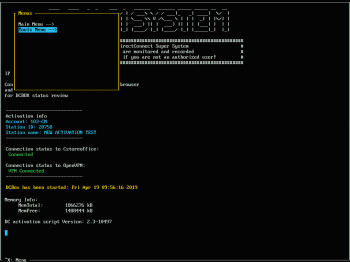
- Once the DC-401 console interface loads, on the keyboard, press CTRL + X to access the utility.
- Using the arrow keys, in the Menus, select Tools Menu and press ENTER.
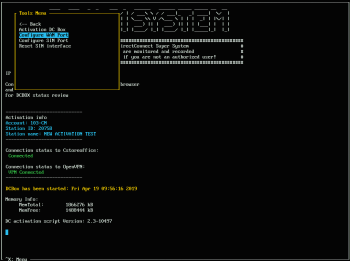
- Using the down arrow key, select the Configure WAN Port option and press ENTER. With this option, you can set up a static IP address for the LAN port 1 (01) — the Internet port on DC-401.
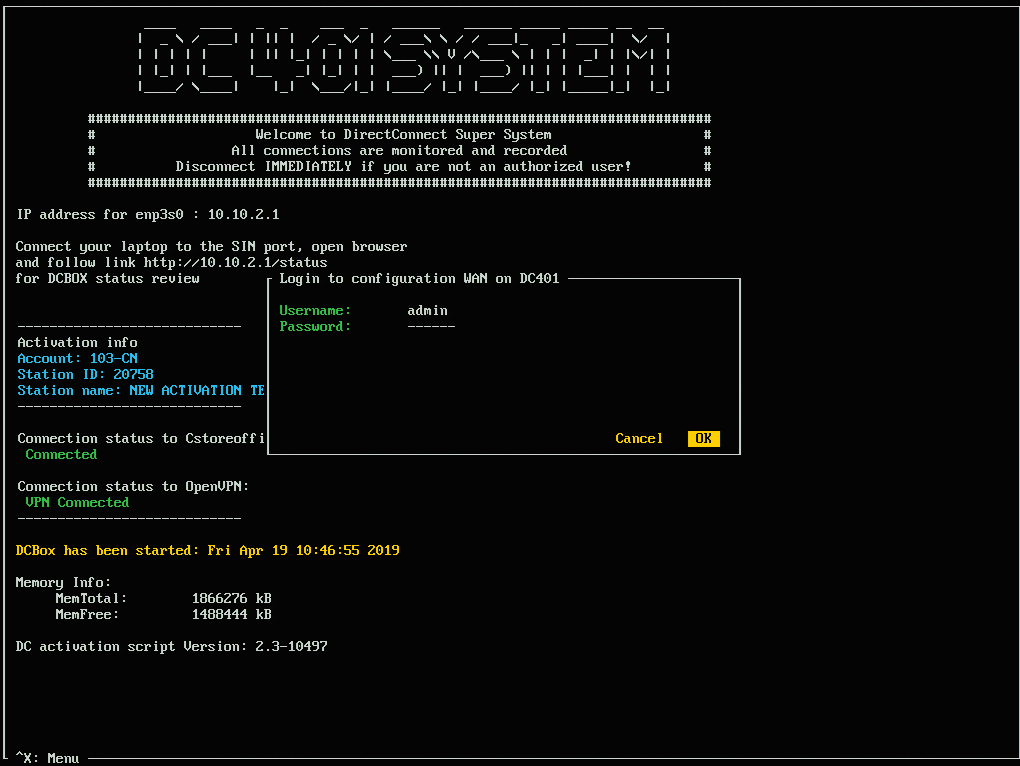
- When prompted, enter the following credentials:


- User name: admin
- Password: Use the password you configured in the Direct Connect Options section > Web interface password field. For more information, see Update Default DC Box Password.
- Use the arrow keys to select OK and press ENTER.

- In the displayed form, enter the new port configuration data.
To move to the next field, press Tab on the keyboard. To get back to the previous field, press the Up arrow key on the keyboard.
- In the IP field, enter the new IP address in the following format: IP: 10.108.X.X. For X.X, use the site-specific IP schema.
- In the Netmask field, specify the network mask: 255.255.255.224.
- In the Gateway field, specify the IP address of the default gateway in the network: 10.108.X.X. For X.X, use the site-specific IP schema.
- In the Primary DNS and Secondary DNS fields, specify IP addresses of the primary and secondary DNS servers in the network.
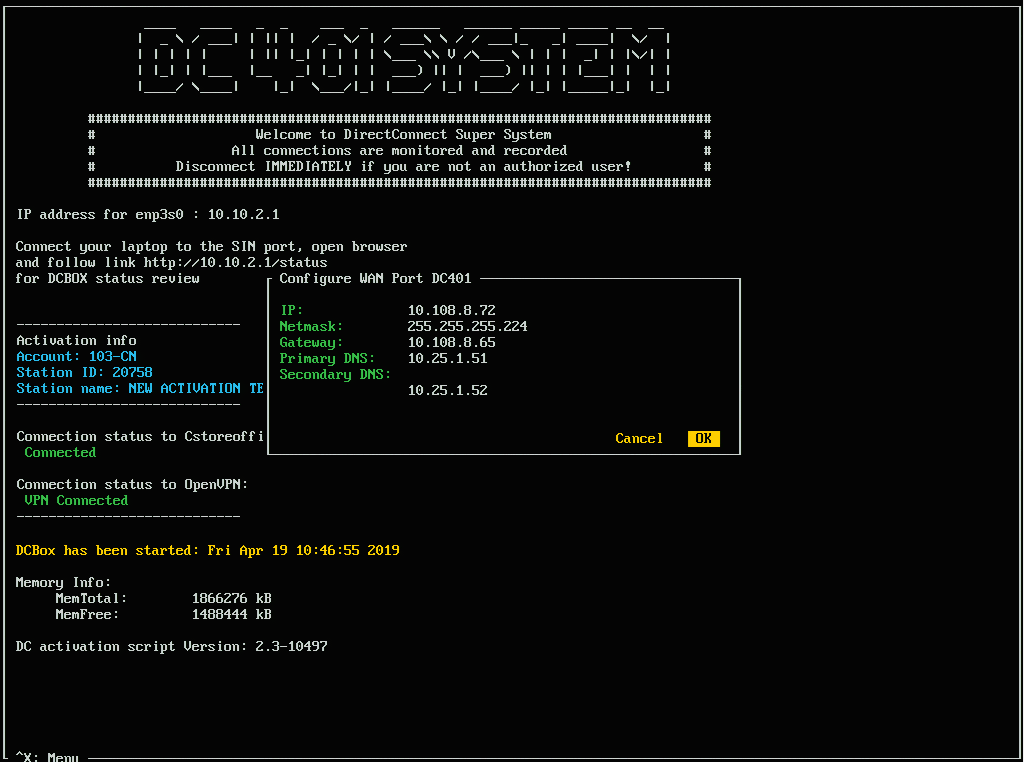
- When you have finished specifying the new port configuration data, use the Tab key to select OK and press ENTER.
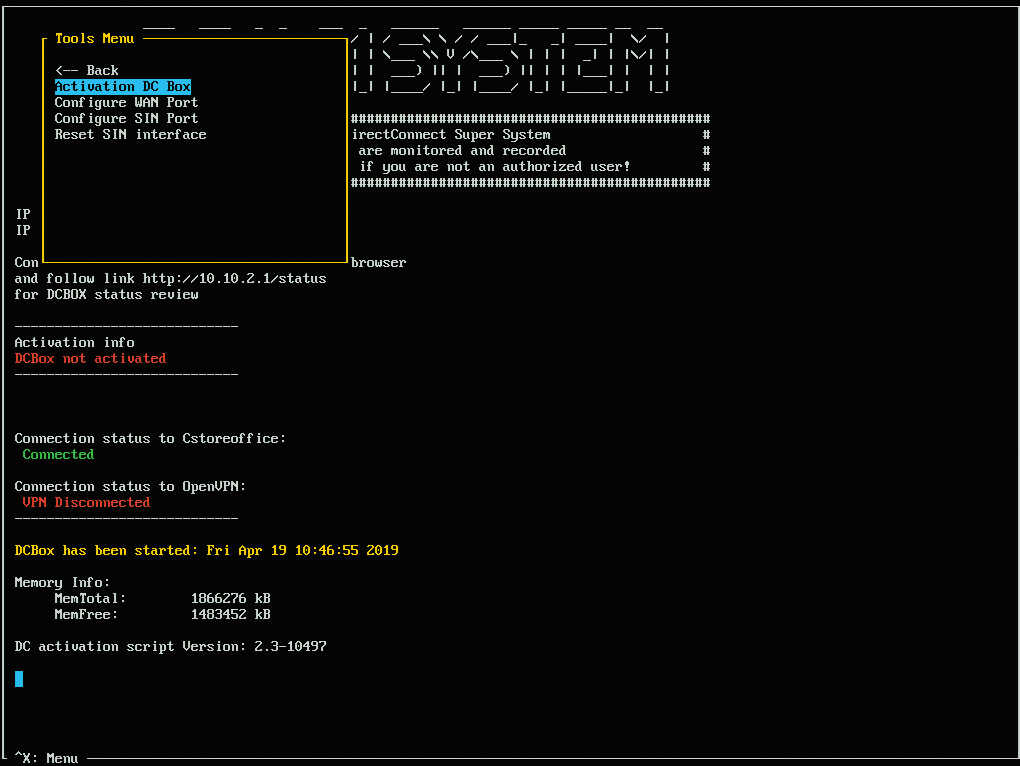
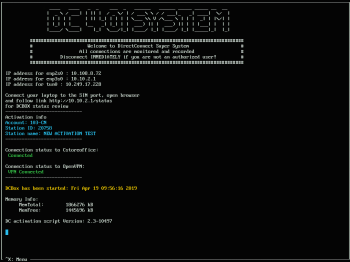
Result: At the top left corner of the utility console, a message box is displayed, indicating that the utility is updating the specified information. - Wait until the utility reloads and make sure the Connection Status to CStoreOffice® field contains the Connected status marked green.
- Press CTRL + X again and re-enter the credentials from step 4.
- Once completed, use the Tab key to move to Tools Menu and press ENTER.
- Use the arrow keys to select the Activation DC Box option and press ENTER.

- In the Please enter your activation key box, enter the activation key for your location.
The activation key must be entered with dashes between digit groups.
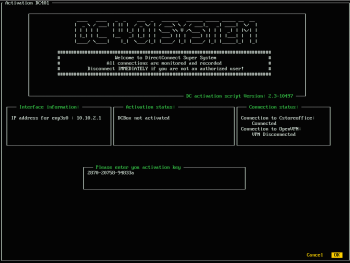
- Use the arrow keys to select OK and press ENTER.
- DC-401 is rebooted automatically. Wait for DC-401 to reboot and check if the Connection Status to C- Store
- Office field contains the Connected status marked green.