The Monitoring Data API allows you to send the information with the cash register status data.
To learn how to use the API, use the sections below:
- Pre-Requisites: Make sure you have prepared all the data required to call the API.
- API Authorization: To be able to call the API, you need to authorize in it.
- Calling the API: Learn the step-by-step procedure on how to call the API.
Pre-Requisites
Before you start calling the Monitoring Data API, make sure the following conditions are met:
- Authorization token: You will need to receive it for getting access to Petrosoft APIs powered by Swagger.
For more information, see Getting Authorization Data. - You have prepared the data from CStoreOffice® to be provided to API request:
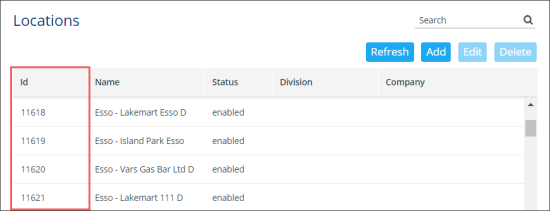
- Station ID: You can get your station identifier from the Locations list.
For more information, see Setting Up Locations.
Authorizing in the Monitoring Data API
To authorize in the Monitoring Data API:
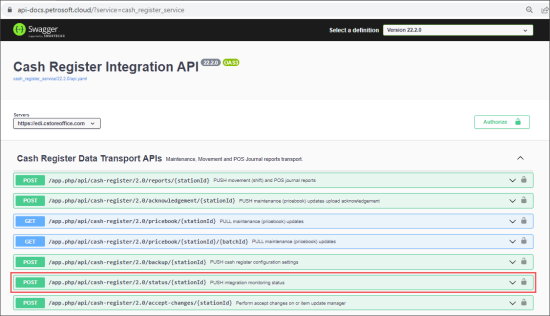
- Go to the Cash Register Integration API by the following the link:
https://api-docs.petrosoft.cloud/?service=cash_register_service - To the right of the PUSH integration monitoring status section, click the open lock icon.
Result: The Available authorizations window opens.
- In the Available authorizations window:
- In the Value field, enter the access token received by your user.
- Click Authorize.
- Make sure the following elements are displayed which indicate that you have successfully authorized:
- Click Close.
The closed lock icon indicates that you are authorized in the API.
Calling Monitoring Data API
To call the Monitoring Data API:
- Go to the Cash Register Integration API by the following the link:
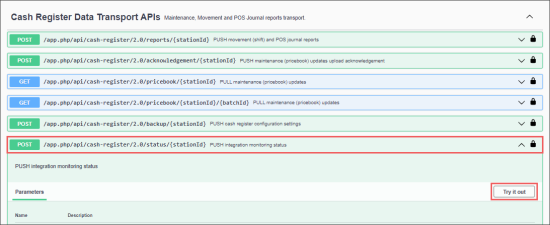
https://api-docs.petrosoft.cloud/?service=cash_register_service - Expand the PUSH integration monitoring status section.
- Click the Try it out button, to enable fields in the Parameters section for entering data.
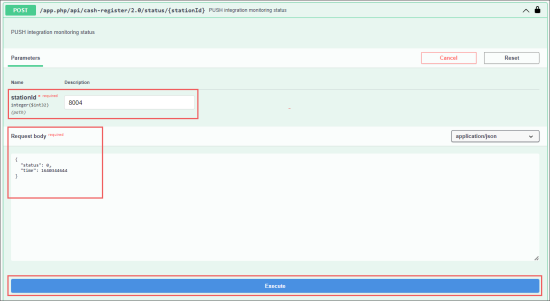
- In the Parameters section > stationId field, enter your station ID.
- In the Request body section, enter the following data:
- received_from_cloud: This field is not mandatory.
- status: Change this value, if needed. Default value is equal to 0. You can enter the following values:
- 0: Cash register is online.
- 2: There is no connection to the cash register.
- 3: The list of files from the cash register cannot be received.
- 5: Error when logging into the cash register.
- 6: Unknown error.
- cloud_online: This field is not mandatory.
- time: Enter the time value in the Unix Time Stamp format.
- Click Execute.
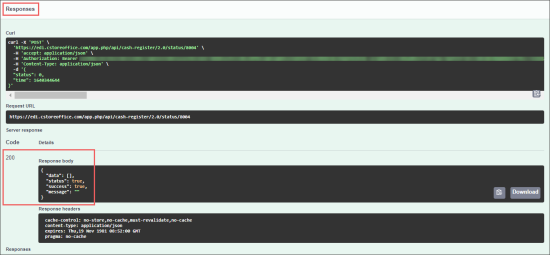
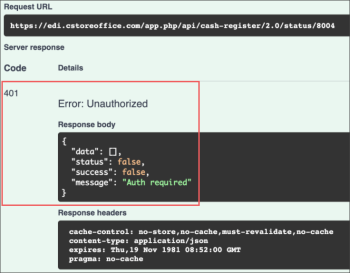
- In the Responses section, make sure the response is displayed, which confirms that the information was received:
- Server response section > Code field = 200
- Detail section > Response body message:
- status = true
- success = true
For confidentiality reasons, the authorization data is blurred intentionally.
