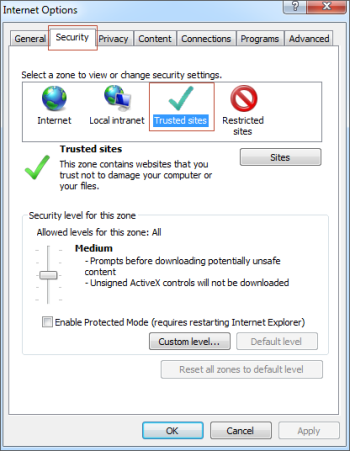
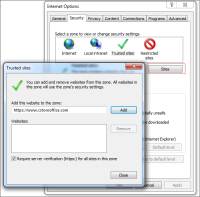
If you are working with the Internet Explorer browser, make sure CStoreOffice® is added to the trusted sites. For more information, see How to add CStoreOffice® into trusted sites in Internet Explorer.
To add CStoreOffice® web site into trusted sites in the Internet Explorer web browser:
To set up the company file path from QB to CStoreOffice®:
- Launch QB on your computer.
- In QB, create a new company. In the main menu, click File > New Company and then follow the QuickBooks Setup process.
- After your company is created, set up the Chart of Accounts using one of the following ways:
- In the main menu, go to Company > Chart of Accounts, and then delete all accounts.
- Go to CStoreOffice®, clear your Chart of Accounts, and then populate it with the data from your QB Chart of Accounts.
Your QB Chart of Accounts will be populated automatically from CStoreOffice® during the first synchronization.
- In the QB main menu, go to Edit > Preferences.
Result: The Preferences window opens. - In the Preferences window, do the following:
- Go to Accounting > Company Preferences.
- On the Company Preferences tab, make sure the following check boxes are selected. If not, select them:
- In the Accounts section, select the Use account numbers check box.
- In the Class section, select the Use class tracking for transactions check box.
- At the top right of the Preferences window, click OK.
- Remember or write down the path where your company file is stored. The company file has the QBW extension.
- Close your company file. In the QB main menu, click File > Close Company.
- Go to CStoreOffice® and then do the following:
- In the CStoreOffice® main menu, go to Transactions > Audit.
- In the Company list, select your company.
- At the bottom of the Audit section, click Open QB Synchronization Manager.
- At the top of the QB Synchronization Manager window, click the Setup [New] button.
- In the Setup window, click Setup Company File Path.
Result: The QB Company File Settings window opens. - In the QB Company File Settings window > New File Path field, do one of the following:
This path will be used in the QB Synchronization Manager, so that QB will "know" where to put data transferred from CStoreOffice®.
You can also change the existing path to the company file by clicking the Change button at the top right of the QB Synchronization Manager window.
Result: The Setup window opens.
- Enter the path for your company file. Make sure the full path to your company file is entered.
- Click Browse, select your company file and then click OK.
To know how to copy the full path to your company file, see How to copy the *.qbw file path manually.
Make sure you enter the FULL path to the company file.
If your company file is saved on your local hard drive, it must have the hard drive letter in it. For example: “E:\Documents and Settings\User\Desktop\cstoreoffice.qbw.”
If your company file is saved on the company network, the file path must be entered the following way: \\servername\folder where file is located\nameoffile.qbw. For example: “\\Petrosoft12ss\data test\Sample.QBW.”
If the file location is not set or set improperly, CStoreOffice® will send the data to any QB file open at the moment of synchronization.
To copy the full path to your company file manually:
- Go to QuickBooks.
- Open the *.QBW file.
- Press CTRL+1 on your keyboard.
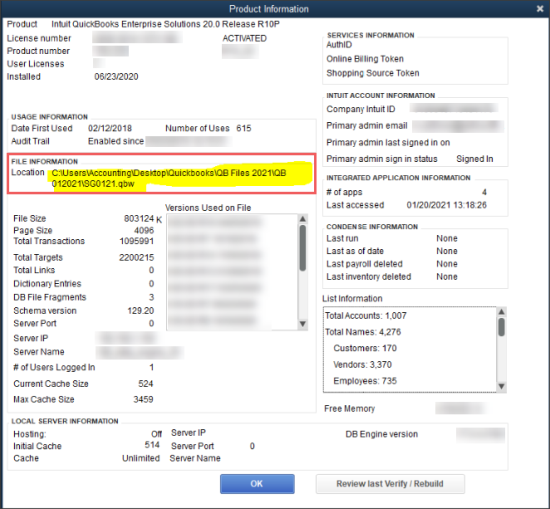
- In the Product Information form:
- Go to the File Information section.
- In the Location field, copy the full path to the file.
Result: The full path name to your company file is copied.
Once the full path name to your company file is copied, you can enter it into the QB Company File Settings window > New File Path field.


