


To configure the QB Web Connector, follow the steps:
- In CStoreOffice® main menu, go to Reports > Accounting.
- In the Accounting list of reports, go to the Export Data section and then click the QB Synchronization Manager report.
Result: The QB Synchronization Manager window opens. - In the QB Synchronization Manager window, click the Setup [New] button.
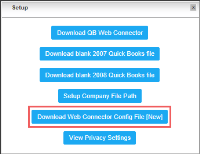
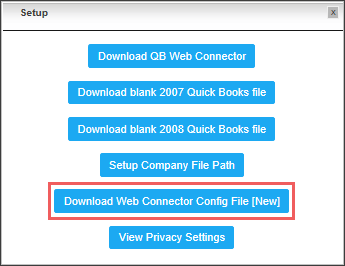
Result: The Setup window opens. - In the Setup window, click Download Web Connector Config File [New].
- Save the file with the QWC extension to your computer and then open it.
- In the Authorize New Web Service window, click OK.
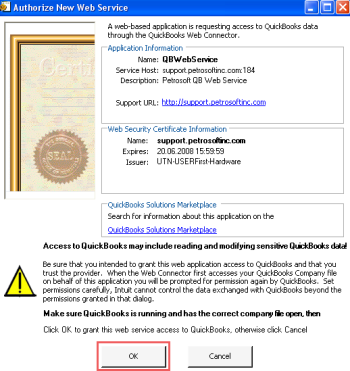
By clicking OK, you are granting the permission for an outside entity (CStoreOffice®) to access QB through the Web Connector.
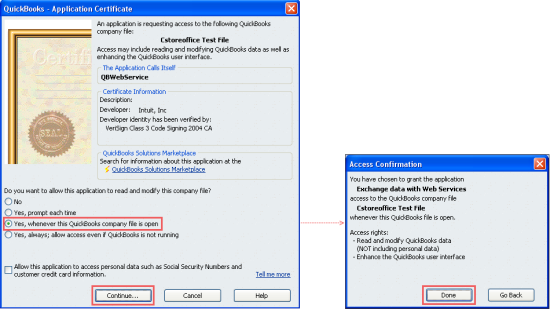
- In the QuickBooks - Application Certificate window, select the access conditions. Do the following:
- Select Yes, whenever this QuickBooks company file is open.
- Click Continue.
- In the Access Confirmation window, click Done.
- Next, you will be asked for a password. The password is sent to you via email or we will inform you about it in another way if requested. However, we will only share this password with an authorized individual. For security’s sake, the configuration file doesn’t contain your password.
- At the bottom of the QuickBooks Web Connector window, monitor the Updating QBWebService status. Wait until it shows a completion message.


By default, the Petrosoft QBWebService runs every 12 minutes. It means that the Web Connector will query the server about any updates every 12 minutes.
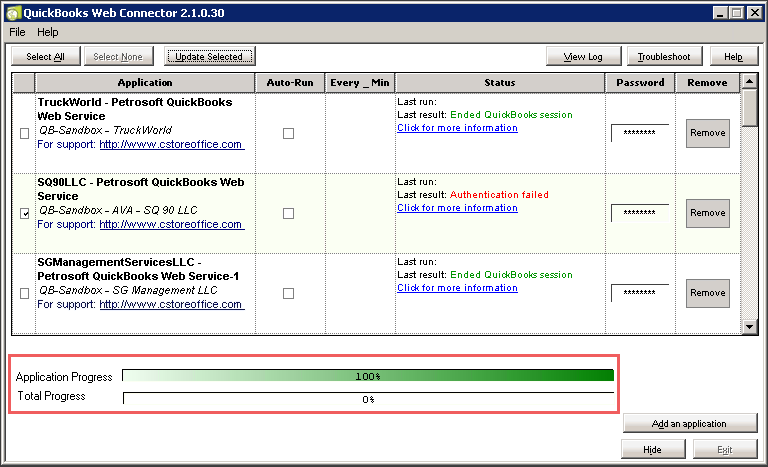
The Total Progress line displays the data only if several servers are synchronized simultaneously.
Result: The connection between CStoreOffice® and QB has been established.


