


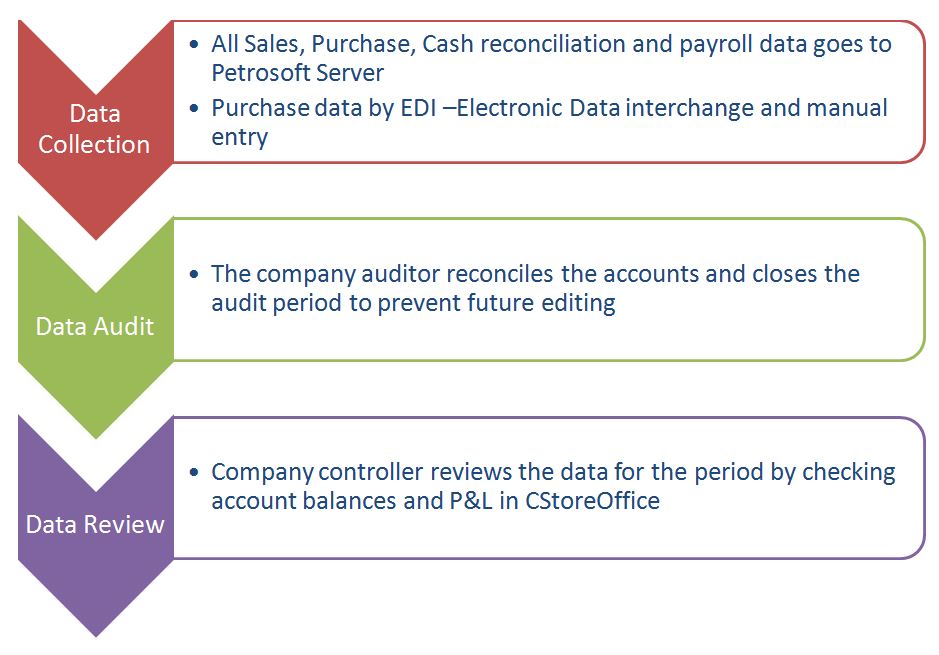
The purpose of the audit process is to reconcile all company cash, bank, assets and liabilities accounts for a given period to make certain they have correct balances and to proof sales, purchase and other data. Another goal is to close reconciled data for future editing. The user who does audits is called the “auditor “and this user will have a special system clearance for this task. The auditor will be able to open and close periods, do changes after a period is closed and do other activities related to auditing. The instrument for the process is the Audit Form located in the Accounting section of CStoreOffice®.
Accessing Audit Form
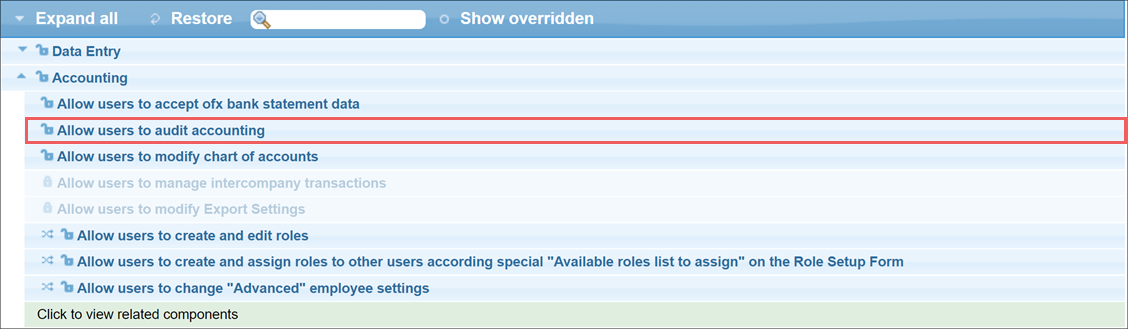
To be able to work with the Audit form, the user should have the Allow users to audit accounting right granted in CStoreOffice®. The account owner has such rights by default. Other users must ask the owner to get access to this form.
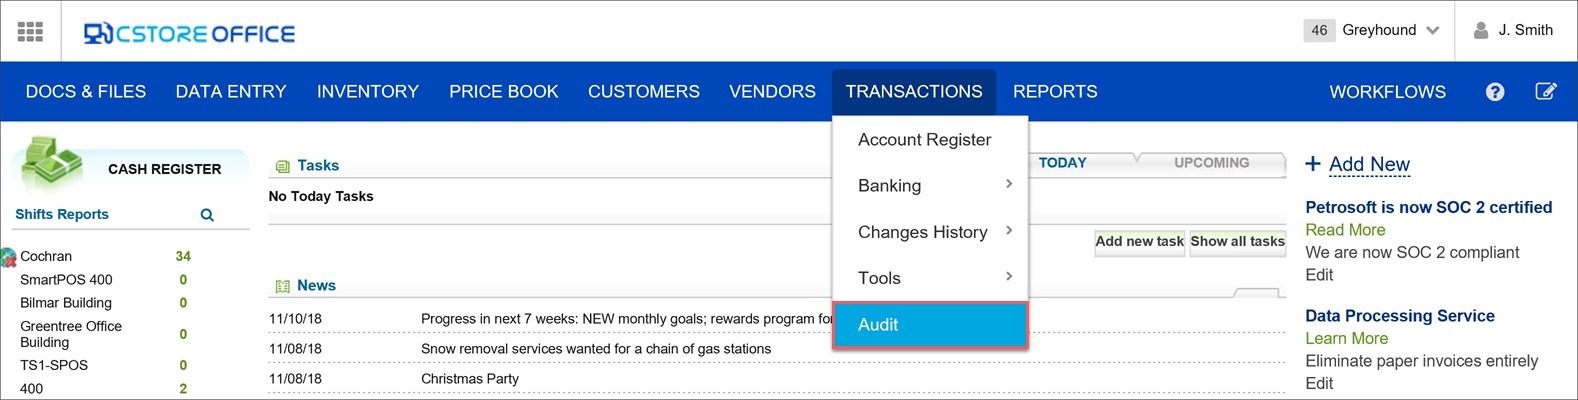
To access the Audit form, go to Transactions > Audit.
The Audit form is designed for the entire company. Accounts are subdivided by station. The user chooses the period and marks the reconciled accounts and proofed data. The process can be interrupted at any stage, saved and continued at a different time. After the audit is done, the DONE button is activated, and the user can finish the process by pressing this button.
Performing Audit
To perform audit in CStoreOffice®, follow the steps:
- In the Audit form, choose the company whose data you want to work with.
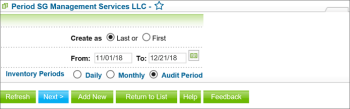
- At the bottom of the Audit form, click Add New.
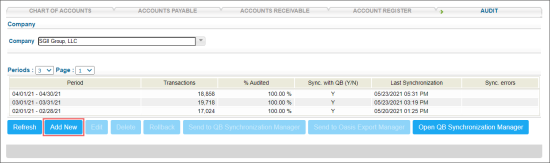
- Create a time period. The starting date of the period is always the next date after the last date of most recent closed period.
If you already have existing periods for the selected company, you have an opportunity to create a period either BEFORE the first existing period or AFTER the last existing period:

- In the first case, the period ending date will be the beginning date for the first existing audit period by default.
- In the second case, the period starting date will be the ending date for last existing audit period.
- Choose how often our system will create inventory records for Gas or Store Inventory–daily, at the beginning and ending of the month, or at the beginning and ending of the audit period.
- Click Next.
Result: The station list for the selected company and company itself is displayed. - Click the station name. The list of accounts subdivided by types is displayed. You can close an account at any stage. Also you can close all the station or company accounts. You have an option to either close types of accounts or any particular account.
- Reconcile accounts and then close them to prevent future editing by unauthorized users. To do this, select the Closed check box next to each account.
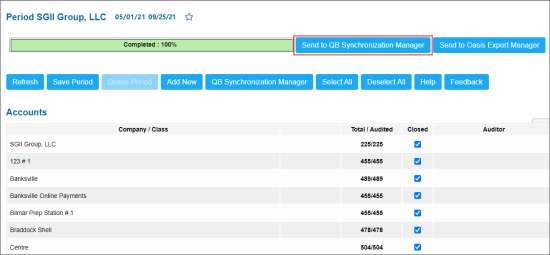
- At the top of the form, you can see progress bar which reports on the status of the accounts closing progress. When all accounts are closed, the bar displays 100%. Recalculation is performed by saving the period.

- When you close all the accounts, the bar reaches 100% and the Send to QB synchronization manager button becomes available. Click this button so that data becomes accessible for synchronization with QB thru QB Synchronization manager.


Working with Audit Periods
To get into the list of current audit periods for this particular company, follow the steps:
- In the Accounting form, click the Audit tab.
- In the Company list, choose the necessary company.
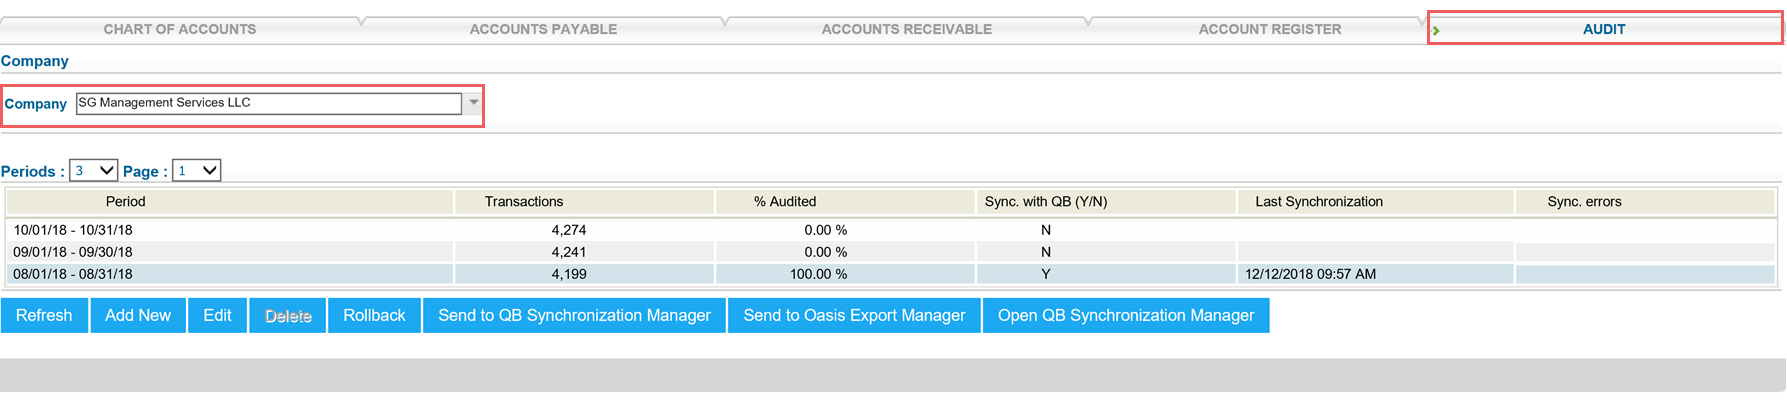
You can perform the following actions with audit periods:
- To add a new audit period, click Add New.
- To edit an audit period, select the period in the list and click Edit.
- To delete an audit period, select the period in the list and click Delete.
- To rollback QB synchronization results for an audit period, select the period in the list and click Rollback. After a rollback, all of the selected period’s transactions revert to the state they were before QB synchronization. Also, the Ready to QB Synchronization option is disabled and these transactions are not available in QB Sync Manager. To get them back into the synchronization process, select the period and click Send to QB Synchronization Manager.
- To mark all transactions of an audit period as ready to be sent to QB, select the period in the list and click Send to QB. These transactions will be available in the QB Sync Manager Report.
- To open QB Sync Manager Report, click Open QB Sync Manager.


