


You can set up merchandise vendors in
To set up merchandise vendors:
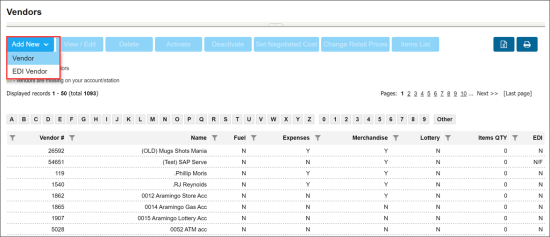
- Go to
- At the top of the vendors list, click Add New > Vendor.
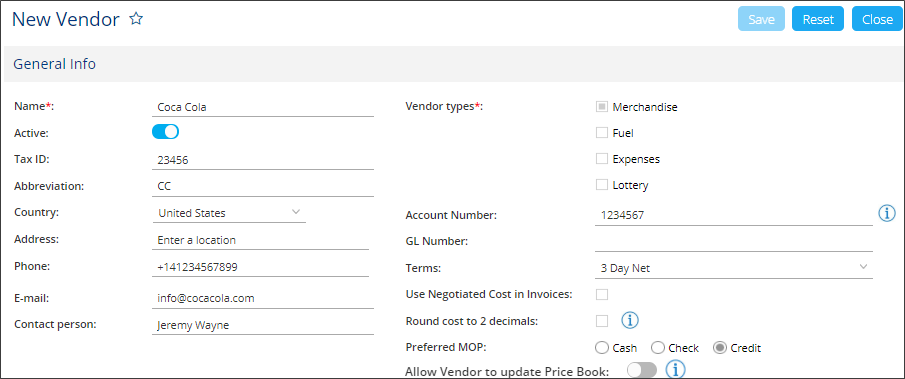
- In the General Info section, configure general settings for the vendor:
- Name: Enter the vendor name. Once you start entering the vendor name, similar names of existing vendors are displayed.
- Tax ID: Specify the vendor's tax identification number. The tax ID is the unique identifier provided by the tax office to the tax payer.
- Active: Newly created vendor is activated by default. To deactivate a vendor, set the toggle to the Off position.
- Abbreviation: This field can be populated only by the users with the system role. If you need to set up the abbreviation assigned to the vendor, please contact the Petrosoft Support team.
- Country, State, City, Address, Zip, Phone, Fax, Email: Specify data for the office location of the vendor.
To specify the address information, from the Country list, select the necessary country and in the Address field, start typing the vendor address.
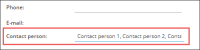
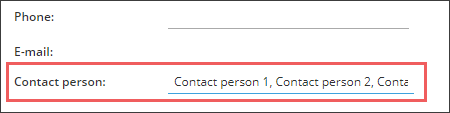
- Contact person: Specify a person who serves as your contact at the vendor office. This is usually your sales representative. If you need to add several contact persons, separate them by a comma as shown below.
- Vendor types: Vendors can supply fuel, store items or services to you. Specify the vendor type to facilitate accurate vendor lists in the Data Entry and Price Book forms of the site. Vendors can be labeled by any of the following types:
- Merchandise: Vendors of this type appear in all lists and forms related to the store.
- Fuel: Vendors of this type appear in all lists and forms related to your petroleum products.
- Expenses: Vendors of this type appear in all lists and forms related to expenses.
- Lottery: Vendors of this type appear in all lists and forms related to your lottery games.

Vendor type is also important for keeping accounting properly. For example, only vendors of the Expenses type can be selected for the transactions created for the expenses accounts.
- Account Number: Enter the number of your account assigned by the vendor.
- GL Number: Enter the global account number for this vendor. This field is optional. To make it mandatory, contact your system administrator.
- Terms: Select the payment terms.
- Use Negotiated Cost in Invoices: Select this check box to apply the negotiated cost to all items from this vendor by default in all manually created invoices.
- Round cost to two decimals: Select this option, if you need to round costs in the invoices from this vendors up to two decimals.
- Preferred MOP: Select one of the following methods of payment used for this vendor:
- Cash
- Check
- Credit
- Cost Variance Range: If the item's cost from the invoice differs from the item's vendor cost (negotiated cost) and you need to disregard this difference in further calculations, enter its value into this field. The cost exception is not created for the item, if the difference between the item's cost and negotiated cost values is not more than the Cost Variance Range value. A value with an accuracy of two decimal points can be entered. This field is not mandatory.
- Allow Vendor to Update Price Book: Select this option, if you need all items and VINs coming in electronic invoices from this vendor to be added to the price book automatically.
For system operators, this option is not applicable as they must always enter cost manually from the printed invoice.
To set the negotiated cost for the vendor, go to Vendors List, select the vendor and then click the Set Negotiated Cost button.
For more information on how to analyze the cost exceptions data, see Cost Exceptions report.
For more information on how to process different item costs in the invoice, see Defining the Item's Unit Cost in the Invoice.
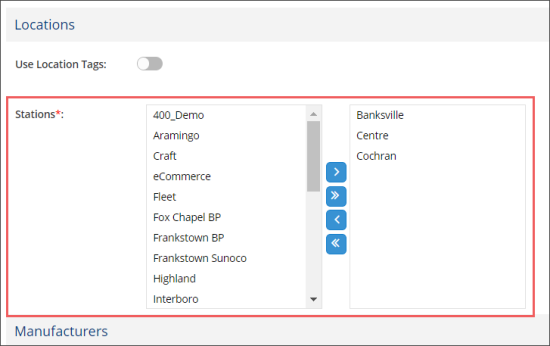
- In the Locations section select the locations (stations) and location tags for which the vendor must be active:
- Locations (Stations): In the Stations list, select stations (locations) and move them to the right column.
- Location Tags: Set the Use Location Tags toggle to the On position and select the location tags you need.

- To export merchandise orders for the vendors, if needed, in the Export Settings section, configure the vendor export settings.
- At the top of the form, click Save.
For more information, see Configuring Vendor Export Settings.
When you save the vendor settings, you can additionally edit the following settings:
Editing Vendor Price Book Settings
To configure, edit, or view the vendor's Price Book, click one of the following links:
- Upload Pricebook: This link is displayed for the vendor without Price Book items. To upload the pricebook, use the Import Tool.
- View Pricebook: This link is displayed in case the vendor has Price Book items.
- Export Pricebook: This link is displayed in case the vendor has Price Book items. Click the link, select the destination folder and then click Save. The Price Book is saved in the XLS file.
- Import Pricebook: Click the link to import the Price Book items for the vendor.


The links are displayed depending on the vendor's configuration stage.
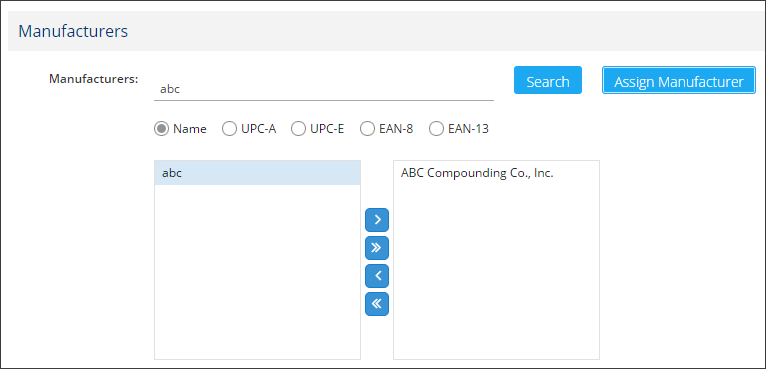
Assigning Vendor Manufacturers
To assign a manufacturer to the vendor, follow the steps:
- Search the manufacturer using one of the following search criteria:
- Name
- UPC-A
- UPC-E
- EAN-8
- EAN-13
- Select manufacturer and then add it to the Selected column.
- Click Assign Manufacturer.

Price Book—Adding a New vendor
How to add a non EDI merchandise vendor
This video contains instructions on how to add a non EDI merchandise vendor in PIM.


