


This section describes the specifics of accessing and interpreting the Consolidated Store Inventory Progress report.
You can use the Consolidated Store Inventory Progress report instead of the Store Inventory page that has been eliminated. Here you can find all of the same information as on the Store Inventory page.
This section consists of the following subsections:
Opening Report
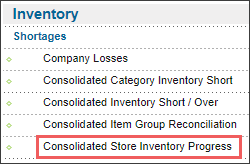
You can find the report at Reports > Store > Inventory > Shortages > Consolidated Store Inventory Progress Report. For more information, see Viewing Reports.
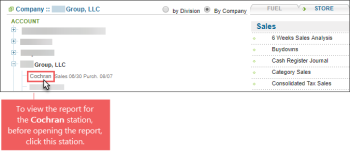
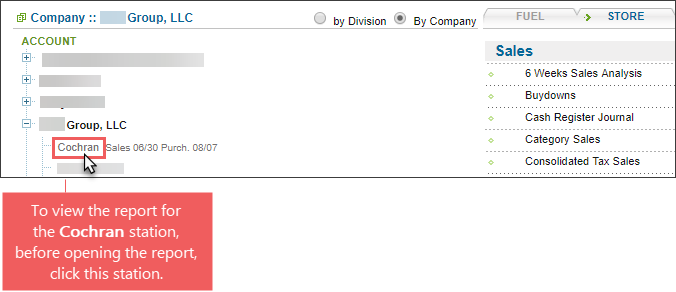
You can open the report at all levels (account, division, company, and station). For example, to view the report for one particular station:
- From the CStoreOffice® main page, click Reports > Store.
- Select by Division or by Company and then select the station you need.
- In the Store reports list, go to Inventory > Shortages and then click the Consolidated Store Inventory Progress report.

Viewing Report
The Consolidated Store Inventory Progress report provides the store inventory overview for the selected period.
Depending on the method of accounting selected at the top of the report, the Consolidated Store Inventory Progress report displays the following data:
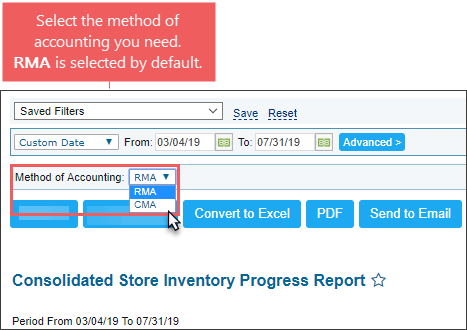
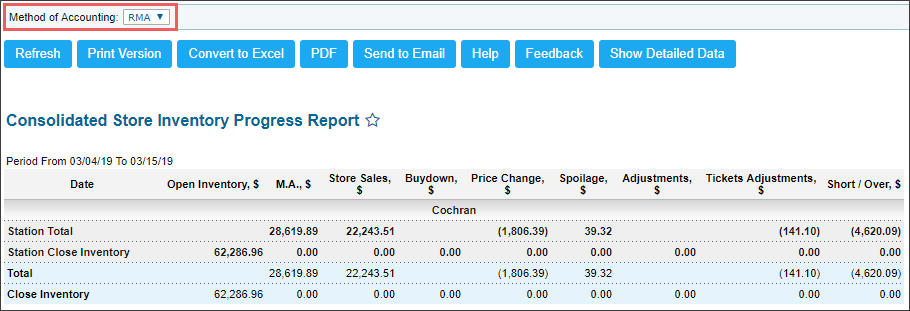
- In case RMA (Retail Method of Accounting) is selected:
- Date: The date of the report.
- Open Inventory, $: Ending inventory for the previous day.
- M.A., $: Merchandize additions made during the day.
- Store Sales, $: Total amount of sales.
- Buydown, $: Total amount of buydowns.
- Price Change, $: Amount of price changes.
- Spoilage, $:
- Adjustments, $: This field is deprecated. It is planned to be removed during next releases.
- Tickets Adjustments, $: Amount of ticket adjustments.
- Short / Over, $: Shortages and overages for the day.

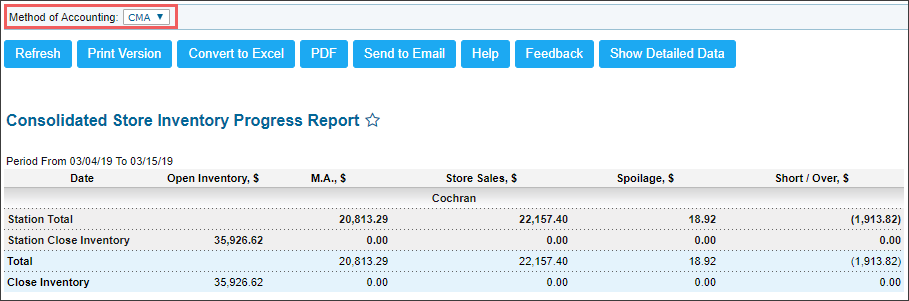
- In case CMA (Cost Method of Accounting) is selected:
- Date: The date of the report.
- Open Inventory, $: Ending inventory amount for the ending of the day.
- M.A., $: Merchandize additions made during the day.
- Store Sales, $: Total amount of sales.
- Spoilage, $:
- Short / Over, $: Shortages and overages for the day.

For more information about the Retail Accounting Method (RMA) and Cost Accounting Method (CMA) used in CStoreOffice®, go to the CMA and RMA section.
Filtering Report Data
The report provides the following filtering and sorting options:
- Date. Specify the period you are interested in manually using the calendar or use one of the available filtering options, and then click Refresh There are the following filtering periods available:
- Custom Date
- Yesterday
- Current Month
- Current Quarter
- Current Year
- Last Month
- Last Quarter
- Last Year
- Last 12 Months
- advanced. Click the advanced button, select one several filtering options you want, and then click[ Refresh. There are the following advanced filtering options available:
- Filter by Station Tags. Use this option to filter the report data by tags assigned to stations. The generated report will contain data only for those stations to which the selected tags are assigned.
- Stations Included. Select the stations you want to view the report for.
- Method of Accounting: Select on of the following methods of accounting:
- RMA: Retail Method of Accounting.
- CMA: Cost Method of Accounting.
Press CTRL to select several items at a time.
Additional Actions
To reload the form, click Refresh.
To print the report, click Print Version.
To open the report the Microsoft Excel document, click Convert to Excel.
To view the report in the PDF version, click PDF.
To have the report emailed to the specified email address, click Send to Email.
To open the Petrosoft Cloud Help, click Help.
To create a ticket, click Feedback.
To view the report's detailed data, click Show Detailed Data.
To view the totals only, click Show Totals Only.
To add a note to the report, go to Additional > Add Item, enter the note's headline and text and then click Submit. All added notes are displayed in the Additional section.


